When an overlanding trip takes you beyond reliable fuel stations, fuel management becomes more than simply watching the gauge. Remote trails, long stretches of highway, poor road conditions, detours, heavy vehicle loads, and extended periods of low-speed off-road driving can all increase the amount of fuel you need. A route that looks comfortably within your vehicle’s normal range on a map may leave considerably less margin in real-world conditions.
Carrying extra fuel can provide a valuable range buffer, but it also introduces additional weight, storage requirements, spill risks, and fire hazards. Gasoline in particular produces highly flammable vapors, so an extra fuel container should be treated as safety-critical equipment rather than ordinary camping gear. The U.S. Consumer Product Safety Commission recommends keeping portable fuel containers closed and in cool, well-ventilated areas and warns that escaped fuel vapor can ignite when it encounters a flame or spark.
A practical overlanding fuel-management strategy can be broken into three steps:
- Calculate how much extra fuel you actually need.
- Choose the right overlanding fuel storage solution for your vehicle and trip.
- Transport, mount, and store that fuel safely.
The goal is not necessarily to carry the maximum amount of fuel possible. Carrying unnecessary fuel adds weight and can reduce payload capacity, while an inadequate reserve can leave you stranded. Instead, the right system should provide enough additional range for the route while fitting your vehicle’s available space and weight limits.
This guide takes a buyer-focused approach to overlanding fuel storage, covering portable fuel cans, steel jerry cans, flat modular containers, auxiliary tanks, and flexible fuel bladders. The best option depends on several factors, including vehicle type, fuel type, trip length, terrain, expected fuel consumption, available mounting space, payload capacity, and budget.
What Is Overlanding Fuel Management?
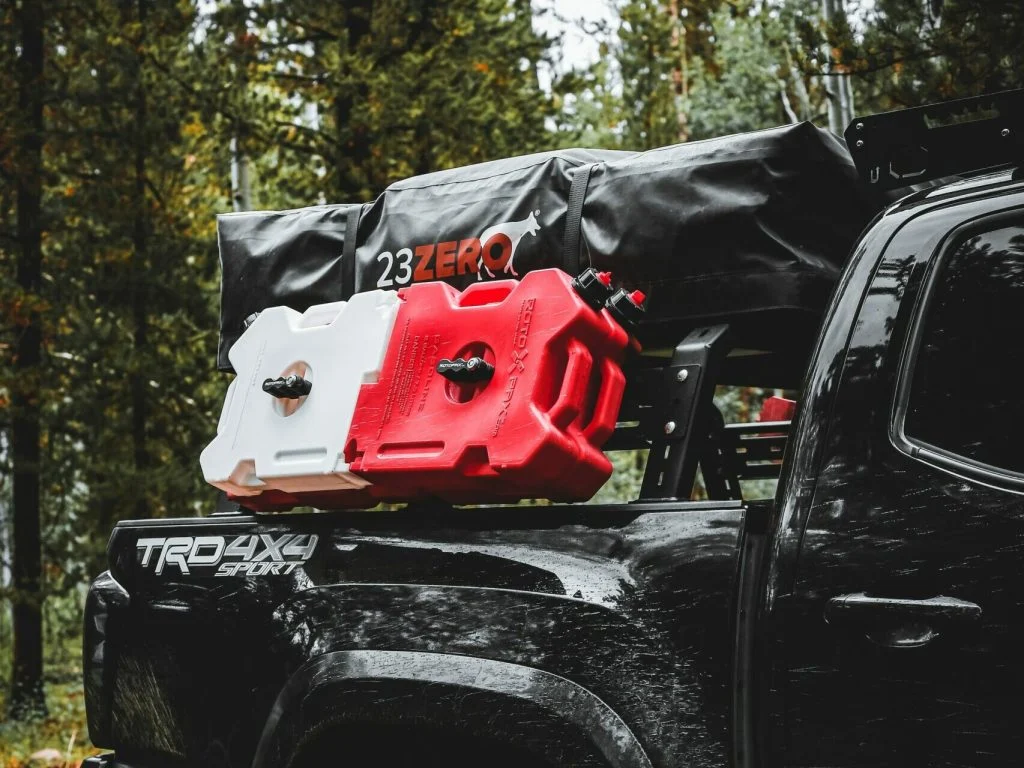
Overlanding fuel management is the process of planning, carrying, storing, monitoring, and using enough fuel to complete a trip safely when normal refueling opportunities may be limited.
It goes beyond simply adding a fuel can to the back of a vehicle. Good fuel management considers your vehicle’s real-world fuel economy, route distance, fuel-station availability, terrain, payload, weather, driving conditions, reserve requirements, container capacity, mounting location, and refueling method.
For example, a vehicle that normally achieves 20 MPG on paved roads may consume substantially more fuel while traveling slowly over sand, mud, rocks, steep grades, or rough trails. Similarly, carrying a rooftop tent, recovery equipment, water, passengers, camping gear, and extra fuel increases vehicle weight and can further affect fuel consumption.
The objective is therefore to create a predictable fuel plan rather than simply carrying as much fuel as possible.
Why Fuel Management Matters on Remote Trips
Long distances between fuel stations are one of the most obvious reasons to carry additional fuel. Some overlanding routes pass through areas where the next dependable fuel station may be hundreds of miles away. A station shown on an old map or navigation app may also have limited operating hours, unavailable fuel, or temporarily closed service.
Off-road driving can increase fuel consumption. Low-gear driving, frequent acceleration and braking, steep climbs, soft sand, mud, rocks, four-wheel drive, and prolonged idling can all reduce fuel economy compared with normal highway driving. This is why serious trip planning should use your vehicle’s actual fuel economy under comparable conditions rather than relying solely on its advertised MPG.
Remote trails and backcountry routes create fewer alternatives. On a highway, missing one fuel stop may be inconvenient but manageable because another station is often nearby. On a remote trail, there may be no practical alternative. A wrong turn, trail closure, washed-out crossing, or navigation error can add significant distance before you reach a refueling point.
Traffic, detours, and unexpected delays also matter. Fuel planning should account for more than the distance printed in a route planner. Construction, road closures, weather, waiting at border crossings, slow convoy travel, and unplanned exploration can all extend the trip.
Finally, an emergency reserve provides a margin for situations that cannot be predicted. The purpose of that reserve is not to encourage running the main tank nearly empty; it is to provide additional options when circumstances change.
Extra Fuel vs. Simply Increasing Driving Range
There are several ways to increase an overland vehicle’s usable fuel range, and each has different costs, capacity, and installation requirements.
Main fuel tank:
The simplest solution is to work within the capacity of the vehicle’s factory tank. This avoids additional equipment, mounting hardware, and fuel-transfer procedures. For many trips, careful route planning and filling the tank at every dependable opportunity may be enough.
Auxiliary fuel tank:
An auxiliary tank permanently adds fuel capacity to the vehicle. Depending on the system and vehicle, fuel may be transferred into the main tank through a controlled fuel-management system. These systems can provide substantial additional range without requiring several portable cans, but installation is more expensive and compatibility with the vehicle’s fuel system is critical. Some aftermarket systems use electronic pumps and controls to transfer fuel from the auxiliary tank to the main tank.
Portable fuel containers:
Portable cans are generally the most flexible option. You can carry only the amount required for a particular trip and remove the containers when they are unnecessary. They are particularly useful for occasional overlanders who do not want to permanently modify the vehicle.
Combination approach:
For long-distance travel, a combination of the factory tank and a modest amount of portable or auxiliary fuel can provide a practical balance. The main tank handles normal driving while the additional fuel serves as a calculated reserve for remote sections.
The important point is that increasing range should not come at the expense of safe weight distribution or proper fuel containment.
How Much Extra Fuel Should You Carry?
A useful starting point is:
Estimated extra fuel = Distance between reliable fuel stops ÷ Real-world MPG × safety reserve
For example, suppose your longest section between dependable fuel stations is 300 miles, and your vehicle realistically achieves 15 MPG under the expected loaded and off-road conditions:
300 ÷ 15 = 20 gallons
If you then add a 20% planning reserve:
20 × 1.20 = 24 gallons
That does not necessarily mean you must carry exactly 24 gallons in portable containers. Your vehicle’s main tank may already cover part of that requirement. Instead, compare the vehicle’s usable main-tank range against the distance you need to cover and carry enough additional fuel to close the gap.
The critical factor is real-world MPG. Manufacturer fuel-economy figures are useful for comparison, but they should not be treated as guaranteed performance during an expedition. A heavily loaded 4×4 traveling slowly through sand or mountainous terrain can consume significantly more fuel than the same vehicle driven on a flat highway.
For better planning, record your own fuel economy during comparable trips. Consider the vehicle’s actual load, tire pressures, terrain, weather, speed, and driving style. It is also wise to plan around reliable fuel stops, not every station shown by a navigation application.
Types of Overlanding Fuel Storage Solutions
There is no single best fuel container for every overlanding vehicle. A compact SUV with limited exterior mounting space has very different requirements from a full-size pickup carrying several hundred liters of expedition equipment.
The main choices are plastic fuel cans, steel/NATO-style jerry cans, flat modular containers, auxiliary fuel tanks, and specialized flexible fuel bladders. Each has a different balance of capacity, durability, weight, installation complexity, and cost.
Plastic Fuel Cans
Plastic fuel cans are among the most accessible options for carrying additional gasoline or diesel. Modern containers are typically manufactured from fuel-compatible plastic and can offer a good combination of low weight, corrosion resistance, and affordability.
One major advantage is weight. A plastic container itself is generally lighter than an equivalent steel jerry can, which can be important when an overlanding vehicle is already close to its payload limit. Plastic also does not rust in the same way steel can, making it useful for vehicles exposed to rain, mud, road salt, or humid environments.
Another benefit is easy handling. A smaller plastic container can be carried, removed, and poured by one person more easily than a large steel container.
However, not every plastic container is suitable for vehicle-based fuel storage. Look for a container specifically designed and approved for the fuel you intend to carry. Do not substitute water containers, chemical containers, household plastic vessels, or improvised containers for gasoline or diesel.
For example, in the United States, portable fuel containers are subject to specific requirements. CPSC regulations require covered empty portable fuel containers to comply with standards such as ASTM F3326-21, while safety cans may use UL 30:2022 as an alternative under the applicable rule.
When buying a plastic fuel can, check:
- Fuel compatibility, especially for gasoline, diesel, or ethanol-blended fuel
- Manufacturer certification or applicable compliance markings
- Cap and gasket quality
- Leak resistance
- Spout or dispensing system
- Venting design
- Mounting compatibility
- UV and temperature suitability
- Replacement-parts availability
- Container capacity and filled weight
Venting deserves particular attention. Modern fuel containers have evolved to control evaporative emissions, and U.S. EPA guidance was updated in 2025 to clarify that compliant designs can incorporate vents, including self-closing vented designs, to improve fuel flow during refueling.
A quality plastic can can be an excellent choice for occasional overlanding, but it should still be mounted securely and protected from unnecessary impacts, abrasion, and heat.
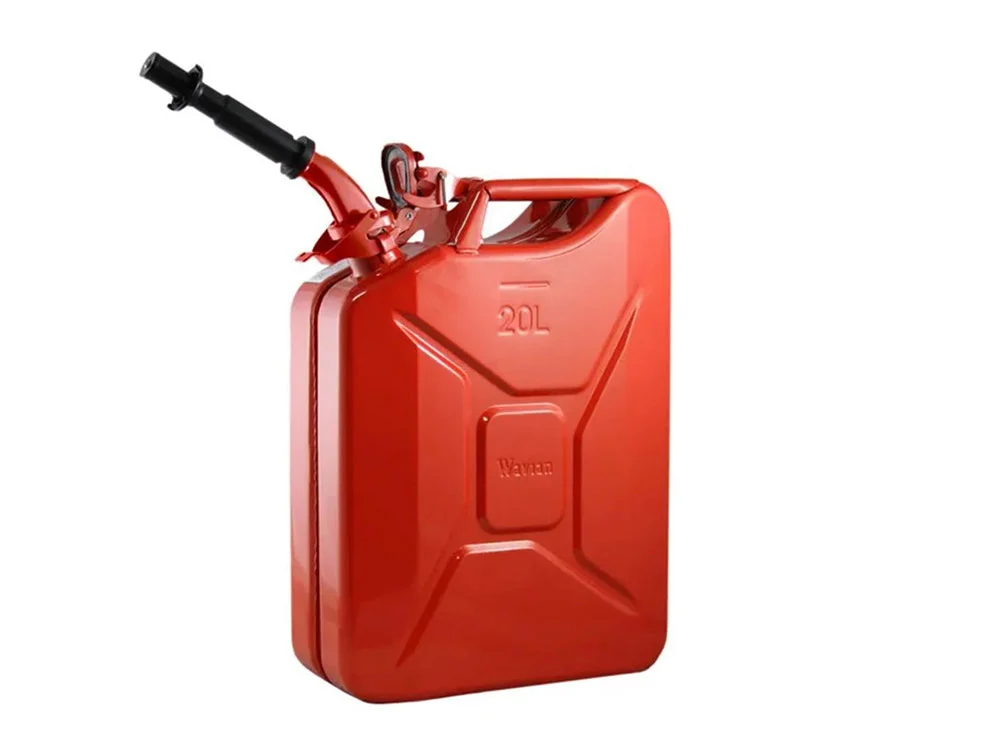
Steel/NATO-Style Jerry Cans
Steel jerry cans remain popular among serious overlanders because of their rugged construction and long history of military and expedition use.
A quality steel/NATO-style jerry can offers several advantages:
- Strong metal construction
- Excellent resistance to impact
- Long service life when properly maintained
- Secure cap and closure systems
- Easy stacking or mounting with compatible brackets
- Familiar design with many aftermarket accessories
Their main disadvantage is weight. Steel weighs more than comparable plastic, and that difference becomes significant when carrying multiple containers.
For example, a 20-liter steel container already has substantial empty weight before fuel is added. Several full containers can therefore add a considerable load to the vehicle. That additional mass should be included when calculating payload and axle loads.
Steel also requires more attention to corrosion. Scratched paint, damaged coatings, water exposure, and neglected seams can eventually cause rust. A steel container should therefore be inspected regularly, particularly after extended exposure to mud, salt, or moisture.
NATO-style cans are especially attractive for overlanders who prioritize durability and long-term use. They can make sense for repeated expeditions, harsh environments, and vehicles equipped with strong external jerry-can mounts.
However, buyers should distinguish between a genuinely compliant, fuel-rated container and a decorative or surplus-looking container. The appearance of a traditional jerry can does not automatically establish that it is appropriate for transporting your particular fuel.
RotopaX-Style Modular Fuel Containers
Flat modular fuel containers take a different approach to fuel storage. Instead of using a tall rectangular jerry can, they use a low-profile container designed around a dedicated mounting system.
This design is particularly useful when conventional jerry cans would interfere with doors, recovery equipment, suspension movement, spare tires, or other gear.
The major advantage is space efficiency. A flat container can be mounted against a vehicle surface or other suitable structure without creating the same depth as a conventional can. Some systems can also be mounted to spare-tire carriers, roof-rack structures, roll bars, or dedicated brackets, depending on the manufacturer’s approved mounting hardware. RotopaX, for example, offers mounting systems for flat surfaces, bars, and spare-tire applications.
Modularity is another major benefit. Certain systems allow users to select different container capacities and combine fuel, water, and storage packs around a common mounting ecosystem. Current RotopaX fuel products include 2-gallon containers and are marketed as compliant with applicable EPA, CARB, and ASTM requirements.
This makes modular containers particularly attractive for:
- SUVs with limited cargo space
- Jeep-style vehicles
- Pickup trucks with crowded beds
- Vehicles using spare-tire carriers
- Lightweight expedition builds
- Short to moderate-range fuel requirements
The trade-off is cost. A modular container plus its dedicated mount can cost substantially more than a basic plastic fuel can. The mounting hardware is part of the system, so comparing only the container price can give a misleading picture of the total cost.
Another consideration is capacity. Flat modular containers often prioritize mounting flexibility over maximum volume. If your expedition requires a large amount of additional fuel, several containers may be needed, which increases both cost and total weight.
Auxiliary Fuel Tanks
Auxiliary fuel tanks provide a more integrated solution for drivers who regularly travel long distances.
Instead of carrying multiple portable containers, an auxiliary tank adds permanent onboard capacity. Depending on the vehicle and system, the auxiliary tank may be installed in the bed of a pickup, underneath the vehicle, or in another engineered location.
The biggest advantage is capacity and integration. A properly engineered system can hold considerably more fuel than a single portable can while keeping the fuel system integrated with the vehicle.
Some modern auxiliary systems use controlled transfer pumps and monitoring systems rather than simply relying on gravity to feed fuel into the factory tank. Transfer Flow, for example, describes systems that automatically transfer fuel from an auxiliary tank into the vehicle’s main tank based on monitored fuel levels.
However, auxiliary tanks require more careful planning than portable containers. The tank, plumbing, pump, electrical components, mounting structure, and vehicle compatibility all matter.
Installation cost can also be significant. Depending on the vehicle and tank design, professional installation may be preferable or necessary.
One particularly important issue is fuel-system legality and engineering. A simple gravity-fed auxiliary system should not be assumed to be safe or legal simply because it transfers fuel from one tank to another. Transfer Flow notes that gravity-fed systems can create safety, emissions, diagnostic, and regulatory concerns on modern vehicles and specifically warns against assuming that such arrangements are automatically acceptable for road use.
Auxiliary tanks make the most sense for:
- Frequent long-distance overlanders
- Expedition vehicles
- Pickup trucks with suitable installation space
- Drivers regularly traveling through fuel-scarce regions
- Vehicles where permanent additional capacity justifies the installation cost
For occasional weekend trips, a quality portable fuel container is often simpler and more economical.
Fuel Bladders and Specialized Flexible Containers
Fuel bladders occupy a more specialized part of the overlanding fuel-storage market. Instead of relying on a rigid plastic or steel shell, they use flexible fuel-compatible materials to store fuel.
Their primary advantage is space utilization. A flexible bladder can sometimes fit into irregular or otherwise difficult-to-use spaces, and collapsible designs can take up much less room when empty. Specialized fuel bladders are also available for applications where weight, impact resistance, or unusual geometry is important.
Aero Tec Laboratories, for example, manufactures flexible fuel-cell and auxiliary bladder systems for off-road, racing, aviation, and other demanding applications. Its products include flexible systems designed for fuels such as gasoline and diesel, with some designs incorporating features such as baffles, vents, quantity gauges, and specialized fittings.
For overlanding, a purpose-built bladder may make sense when:
- Maximum fuel capacity is needed
- Conventional containers cannot fit the available space
- Weight is a major concern
- The vehicle has been purpose-built for expedition travel
- The manufacturer specifically supports the intended fuel and installation
- The bladder can be adequately protected from abrasion, puncture, heat, and impact
There are also significant limitations.
A flexible fuel bladder is not simply a soft jerry can. The material, fittings, venting system, mounting method, fuel compatibility, and protection against abrasion all need to be appropriate for the application.
Compatibility is particularly important. Gasoline, diesel, ethanol blends, and other fuels can have different material-compatibility requirements. Even if a bladder is advertised as “fuel compatible,” verify that the manufacturer specifically approves it for your exact fuel type and concentration.
Installation instructions should also be followed precisely. A bladder that is allowed to rub against sharp metal, exhaust components, suspension parts, or other high-temperature surfaces can fail regardless of how strong the material was when new.
For most casual overlanders, a flexible fuel bladder is usually more specialized than necessary. For purpose-built expedition vehicles where conventional containers cannot provide enough capacity or usable space, however, a properly engineered bladder can be a valuable solution.
Ultimately, the best fuel-storage system is not the one with the largest capacity or toughest appearance. It is the one that provides the required range without exceeding the vehicle’s payload, compromising handling, creating unsafe fuel-vapor exposure, or introducing an unsuitable mounting or transfer system.
Best Fuel Container Types for Overlanding
Choosing the right fuel container is less about finding the largest option and more about matching capacity, construction, mounting method, weight, fuel compatibility, and trip requirements. A weekend overlander may only need a single portable container, while someone traveling through remote regions for weeks may benefit from several containers or a properly engineered auxiliary tank.
For buyers in the United States, compliance is an important consideration. The CPSC states that portable containers for gasoline, kerosene, and diesel are subject to mandatory requirements, including child-resistant packaging and flame-mitigation provisions. For empty portable fuel containers, ASTM F3326-21 is one of the applicable standards identified by the CPSC, while certain safety cans may comply with UL 30:2022. Requirements can differ in other countries, so always check the regulations that apply to your vehicle and travel destination.
Best Overall Fuel Storage Option
Product category: High-quality jerry can or premium portable fuel container
For most overlanders, a high-quality portable fuel container or jerry can is the best overall solution because it provides a practical balance between capacity, portability, cost, and flexibility.
A good portable container should be specifically manufactured for the fuel you intend to carry rather than adapted from another type of storage container. Look for appropriate safety certifications or compliance markings, a secure cap and gasket, durable construction, and a dispensing system that minimizes spills.
Capacity is also important. A container that is too large can become difficult to lift and pour when full, while several smaller containers provide more flexibility. Remember that the fuel itself adds substantial weight: gasoline weighs roughly 6–7 lb per U.S. gallon, depending on composition and temperature, so a 5-gallon container can add more than 30 lb once filled.
For many overlanders, a 3- to 5-gallon portable container is a useful starting point, provided the vehicle’s payload and storage arrangement can accommodate it.
The best overall option should offer:
- Fuel-specific construction
- Appropriate safety certification or regulatory compliance
- Leak-resistant cap and gasket
- Durable handles
- Reliable spout or dispensing system
- A secure mounting solution
- Replacement seals or parts when available
- Capacity appropriate for the required reserve
Avoid choosing a container based solely on its price or appearance. Recent CPSC recalls demonstrate that even recognizable fuel-container products can fail mandatory safety requirements, so buyers should check the exact model and current recall information before purchasing.
Best for: Most SUVs, pickups, and general-purpose overlanding vehicles that need a moderate amount of additional fuel without permanently modifying the vehicle.
Best Space-Saving Fuel Storage Option
Product category: Flat-mounted modular fuel container
If exterior space is your biggest limitation, a flat-mounted modular fuel container can be one of the most useful overlanding fuel storage solutions.
These containers are designed around a low-profile shape that can mount against suitable vehicle structures using a dedicated mounting system. This can make them easier to integrate into builds where a conventional jerry can would protrude too far.
For example, current RotopaX fuel containers use a flat, roto-molded design and dedicated mounting hardware. The manufacturer’s current range includes capacities from 1 gallon through 4 gallons, with different dimensions depending on the model. Its 2-gallon Gen 2 gasoline container, for example, is listed at 18 × 14 × 3 inches and is designed to work with the company’s mounting systems.
The major advantage is efficient use of mounting space. Depending on the vehicle and approved mounting location, a flat container can be positioned on a bed rack, rear carrier, side rail, or other sturdy structure without taking up as much depth as a conventional jerry can.
Modular systems can also allow different containers or accessories to share a mounting ecosystem.
However, this convenience comes at a price. The container and mounting hardware are often purchased separately, meaning the actual cost of a complete system can be considerably higher than that of a basic plastic fuel can.
When evaluating one, consider the complete system rather than the container alone:
- Container capacity
- Container dimensions
- Mount compatibility
- Mount strength and locking mechanism
- Mounting-surface strength
- Clearance from doors and moving components
- Exposure to exhaust heat
- Protection from trail impacts
- Ease of removal for refueling
A dedicated mounting system is particularly important because the container will experience continuous vibration and shock while traveling off-road.
Best for: SUVs, Jeeps, pickups, and expedition builds where conventional fuel cans consume too much usable space.
Best Heavy-Duty Option
Product category: Steel/NATO-style jerry can
For maximum traditional ruggedness, a quality steel/NATO-style jerry can remains a compelling option.
Steel containers are heavier than plastic alternatives, but their rigid construction can provide excellent resistance to impacts and long-term abuse when properly maintained. This makes them attractive to overlanders who routinely travel demanding trails or want a container that can remain part of their vehicle setup for years.
The additional weight is the primary disadvantage. A full steel jerry can can become difficult to handle, particularly when mounted high on a vehicle. Multiple steel cans can also consume a significant portion of the vehicle’s available payload.
Corrosion is another consideration. The container should be inspected periodically for damaged paint, rust, compromised seams, and deteriorated seals. Exposure to mud, water, road salt, and coastal environments can accelerate corrosion.
Buyers should also be careful with inexpensive “military-style” cans. A container that looks like a NATO jerry can is not necessarily manufactured or certified for the fuel you intend to carry.
Before purchasing, verify:
- Fuel compatibility
- Applicable certification or standards
- Construction quality
- Closure and gasket design
- Spout compatibility
- Mounting requirements
- Corrosion protection
- Replacement-part availability
Best for: Serious overlanders, expedition vehicles, and users who prioritize ruggedness and long-term durability over minimum weight.
Best Budget Fuel Storage Option
Product category: Certified plastic fuel can
A certified plastic fuel can is usually the most economical way to add a modest emergency fuel reserve.
Modern plastic fuel containers can be lightweight, corrosion-resistant, and relatively easy to handle. They are particularly useful for occasional trips where permanently installed equipment would not make financial sense.
The key word is certified. The cheapest container available is not automatically the best value. A low-cost container that lacks appropriate safety features or develops a leaking cap can create a much bigger problem than its purchase price suggests.
For U.S. buyers, the CPSC identifies mandatory requirements covering portable fuel containers, including standards relating to child-resistant packaging and flame mitigation. The agency also advises consumers to use proper fuel containers rather than inappropriate plastic bags or other improvised vessels.
A good budget container should therefore provide:
- Appropriate fuel compatibility
- Required safety features
- Recognized compliance with applicable standards
- Secure closure
- Adequate handle strength
- Leak-resistant construction
- A suitable dispensing system
The best budget choice is not necessarily the cheapest container; it is the least expensive container that still provides the required safety, durability, and capacity for your trip.
Best for: Occasional overlanders, short trips, emergency reserves, and buyers who need additional fuel without investing in a premium mounting system.
Best High-Capacity Option
Product category: Multiple-container setup or auxiliary fuel tank
When a trip requires a substantial amount of additional fuel, there are two primary approaches: carry multiple portable containers or install a purpose-built auxiliary fuel tank.
A multiple-container system provides flexibility. You can carry only the amount needed for each trip, distribute the load across suitable mounting locations, and remove the containers when returning to normal daily driving.
For example, modular fuel systems can provide several gallons of additional capacity while keeping each individual container relatively manageable. RotopaX currently offers fuel packs ranging from 1 gallon to 4 gallons, allowing users to build capacity around available mounting space.
The disadvantage is that multiple containers increase the number of caps, mounts, seals, and mounting points that need inspection.
An auxiliary tank is the more integrated solution for frequent long-distance travel. It can provide substantially more permanent capacity, but installation is more complex and expensive. Vehicle compatibility, fuel-system integration, mounting strength, emissions requirements, and transfer controls all need to be considered.
For most occasional trips, multiple quality portable containers are simpler. For a dedicated expedition vehicle that regularly travels beyond reliable fuel infrastructure, a properly engineered auxiliary tank may provide a better long-term solution.
Best for: Long expeditions, fuel-scarce routes, expedition vehicles, and drivers who regularly require significant additional range.
How to Build an Overlanding Fuel Storage System
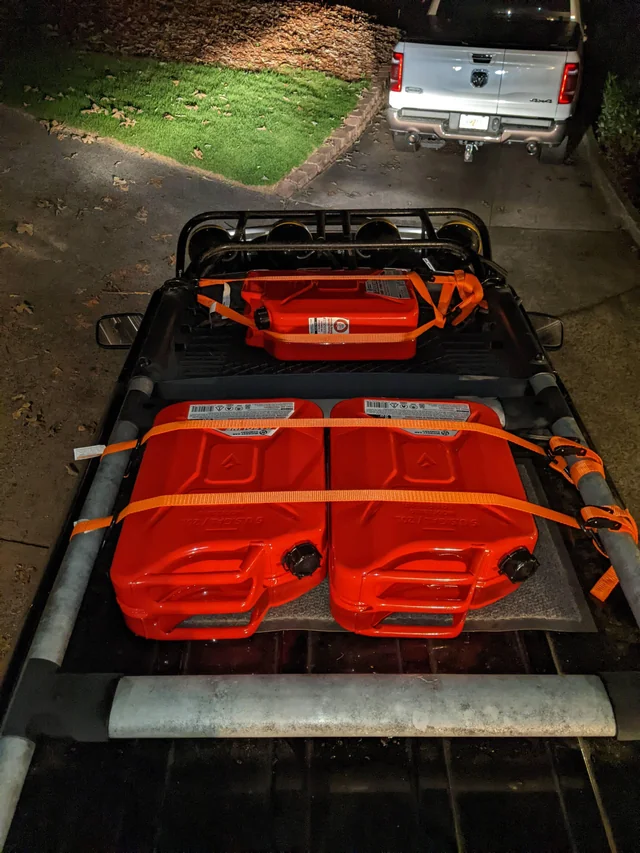
Building an overlanding fuel-storage system should start with fuel requirements, not with shopping for containers.
A common mistake is to buy several fuel cans first and then figure out where to put them. A better approach is to calculate the required reserve, determine available payload and mounting space, select the appropriate container, and then design the mounting and refueling arrangement around it.
Step 1 — Calculate Your Maximum Fuel Requirement
Start by identifying the longest distance between reliable refueling opportunities on your route.
Then estimate your real-world fuel consumption under the conditions you expect to encounter.
A simple planning formula is:
Required fuel = Distance ÷ Real-world MPG × reserve factor
For example, if the longest section is 300 miles and your loaded vehicle averages 15 MPG:
300 ÷ 15 = 20 gallons
With a 20% planning reserve:
20 × 1.20 = 24 gallons
Next, subtract the amount of usable fuel already available in the vehicle’s main tank.
If your vehicle can safely use 18 gallons of its main tank for that section, the additional requirement would be approximately:
24 − 18 = 6 gallons
That could be supplied by several smaller portable containers or an appropriate larger container.
Use conservative real-world MPG rather than laboratory or advertised figures. Record your own fuel consumption during comparable loaded and off-road trips whenever possible.
Also distinguish between maximum theoretical fuel requirement and the amount you actually need to carry. The goal is to maintain an appropriate reserve without unnecessarily adding dozens of pounds of fuel to the vehicle.
Step 2 — Determine Your Vehicle’s Available Storage Space
Before selecting a container, inspect the vehicle from several angles and identify locations where fuel can be securely stored without interfering with normal operation.
Potential areas can include:
- Pickup-bed storage areas
- Dedicated rear carriers
- Exterior cargo racks
- Approved side-mount systems
- Interior cargo areas where legally and safely permitted
- Purpose-built auxiliary-tank locations
Do not assume that an empty-looking area is automatically suitable for fuel storage.
Check for:
- Exhaust components
- High-temperature surfaces
- Moving suspension components
- Steering components
- Door and hatch movement
- Spare-tire clearance
- Recovery gear
- Ground-clearance limitations
- Sharp edges
- Potential impact zones
For roof-mounted systems, also consider the vehicle’s roof load rating and the additional dynamic loads created by off-road driving.
Step 3 — Choose Container Type
Now match the container to your actual requirements.
Choose a portable plastic container when low weight and affordability are priorities.
Choose a steel jerry can when ruggedness and traditional heavy-duty construction are more important than weight.
Choose a flat modular container when mounting space is limited and a dedicated mounting ecosystem makes sense.
Choose an auxiliary tank when you regularly need substantial additional capacity and are willing to invest in a permanent vehicle modification.
Choose a specialized fuel bladder only when its specific design, fuel compatibility, and installation requirements match the application.
Do not choose based only on container capacity. A 5-gallon container may provide more range than a 2-gallon container, but it also weighs substantially more when full and may be harder to mount securely.
Step 4 — Select the Mounting System
A fuel container should not simply be strapped to a convenient part of the vehicle.
The mounting system must be capable of handling vehicle vibration, repeated impacts, braking forces, acceleration, and off-road movement.
Use the mounting hardware specified or approved by the container manufacturer whenever possible.
For modular systems, the mount is an integral part of the product. RotopaX, for example, specifically markets dedicated mounting systems and instructs users to select a sturdy, flat mounting surface with adequate clearance.
Before finalizing the mounting position, verify:
- The container cannot move excessively
- The mounting structure is strong enough
- Fasteners cannot loosen easily
- The container cannot contact the exhaust
- The container cannot obstruct lights or license plates
- Doors and hatches remain functional
- The mount does not interfere with recovery equipment
- Ground clearance remains adequate
- The container is protected from unnecessary trail impacts
Avoid improvised mounting solutions that depend on weak straps, bungee cords, or attachment points not designed to carry the load.
Step 5 — Calculate Total Added Weight
Fuel weight is easy to underestimate.
A rough calculation for gasoline is:
Total fuel weight = Fuel volume × fuel weight per gallon
Gasoline commonly weighs around 6–7 lb per U.S. gallon, depending on composition and temperature.
Therefore, 10 gallons of gasoline can add roughly 60–70 lb, before accounting for the containers and mounting hardware.
For diesel, the weight is generally higher.
Your calculation should include:
Fuel + container + mount + bracket + accessories
For example, two full containers may add substantially more weight than their labeled capacity suggests once the container and mounting system are included.
This matters because overloading can affect:
- Braking
- Steering
- Suspension performance
- Tire loading
- Vehicle stability
- Fuel economy
- Component wear
The load also matters according to where the weight is positioned. Heavy fuel mounted high on a roof can affect the vehicle differently from fuel stored low and near the center of the vehicle.
Always remain within the vehicle manufacturer’s payload, axle, tire, and roof-load limits.
Step 6 — Add a Safe Refueling Solution
Carrying fuel is only half of the system. You also need a practical way to transfer it into the vehicle without unnecessary spills.
Depending on the container, this may involve:
- Manufacturer-supplied spout
- Flexible fuel-compatible nozzle
- Appropriate transfer pump
- Funnel specifically designed for the fuel system
- Other manufacturer-approved dispensing equipment
Do not improvise with ordinary household funnels, bottles, hoses, or containers that are not designed for fuel.
When refueling, keep ignition sources away and follow the fuel-container and vehicle manufacturer’s instructions. CPSC specifically advises consumers to keep portable fuel containers closed when not in use and to handle them in cool, well-ventilated conditions.
The safest refueling system is one that minimizes lifting, awkward pouring angles, splashing, and uncontrolled fuel flow.
Step 7 — Inspect the Entire System Before Departure
Perform a complete inspection before every major trip.
Check the:
- Container body
- Cap
- Gasket
- Spout
- Vent or venting system
- Mounting bracket
- Bolts and fasteners
- Straps or retaining hardware
- Mounting surface
- Nearby exhaust components
- Container clearance
- Signs of abrasion
- Signs of corrosion
- Fuel odor or leakage
Do not travel with a damaged, swollen, cracked, heavily corroded, or leaking fuel container.
It is also useful to inspect the system after the first section of rough driving. Vibration can reveal loose fasteners or movement that was not obvious during a stationary inspection.
How to Choose the Best Overlanding Fuel Storage Solution
The best overlanding fuel storage solution is the one that provides enough additional range without creating an unnecessary payload, mounting, or safety problem.
Start with the fuel requirement rather than the container. Once you know how many additional gallons or liters you actually need, compare the available storage systems using the following factors.
1. Match the Container to Your Fuel
Gasoline and diesel are not automatically interchangeable from a container-design perspective. Always verify that the manufacturer specifically approves the container for the fuel you intend to carry.
For U.S. buyers, check applicable CPSC requirements and relevant standards rather than relying solely on marketing terms such as “heavy duty” or “military grade.”
2. Consider Your Trip Length
For a weekend trip with frequent fuel stations, a small portable reserve may be sufficient.
For a multi-day backcountry route, several portable containers may provide more flexibility.
For repeated long-distance expeditions, an auxiliary tank may eventually make more sense than continually buying and mounting portable containers.
3. Consider Your Vehicle’s Layout
A pickup, SUV, Jeep, van, and expedition truck all offer different storage possibilities.
A flat modular container can be particularly useful where depth is limited, while a traditional jerry can may be more practical where a strong external carrier is already available.
4. Calculate the Full Weight
Never compare fuel containers based on empty weight alone.
Calculate:
Empty container + fuel + mount + hardware = actual added weight
Then consider where that weight will sit on the vehicle.
A lightweight container mounted low and securely can be a better choice than a larger container mounted high simply because it offers more capacity.
5. Evaluate the Mounting System
The container and mount should be considered one system.
A premium fuel container with a weak mounting arrangement is not a premium fuel-storage solution.
Look for a mounting system that is:
- Mechanically secure
- Appropriate for the container
- Compatible with the vehicle
- Resistant to vibration
- Easy to inspect
- Positioned away from heat and moving components
6. Compare Total Cost, Not Container Price
A $100 fuel container may require another $50–$100 or more in mounting hardware, while a cheaper container may already include the required bracket.
Compare the complete system:
Container + mount + spout + accessories + installation
This is particularly important with modular systems, where the mounting hardware may be sold separately. Current RotopaX products, for example, list their fuel containers separately from mounts, although bundle options are also available.
7. Think About How Often You Will Use It
If you only need extra fuel once or twice per year, a quality portable container may provide the best value.
If you frequently travel remote routes, a dedicated mounting system or auxiliary tank may justify the additional investment.
8. Prioritize Safety Over Capacity
More fuel is not automatically better.
Every additional gallon adds weight, and every additional container introduces another potential failure point. The ideal setup provides the minimum practical reserve needed for the route plus an appropriate safety margin.
A well-planned 5- or 10-gallon reserve can be more useful than carrying 20 gallons of unnecessary fuel that reduces payload and changes vehicle handling.
For most overlanders, the decision can be simplified as follows:
| Overlanding need | Best-fit option |
|---|---|
| Occasional emergency reserve | Certified plastic fuel can |
| General-purpose overlanding | Premium portable fuel container/jerry can |
| Limited exterior space | Flat-mounted modular container |
| Maximum ruggedness | Quality steel/NATO-style jerry can |
| Frequent long-distance travel | Auxiliary fuel tank |
| Specialized expedition build | Purpose-built fuel bladder or auxiliary system |
| Very high additional capacity | Multiple containers or engineered auxiliary tank |
The best overlanding fuel storage solution is ultimately the one that fits your fuel requirements, vehicle payload, available mounting space, terrain, trip frequency, fuel type, and budget while maintaining secure containment throughout the journey.
Where Should You Mount an Overlanding Fuel Can?
The safest location for an overlanding fuel can is generally outside the passenger compartment, securely mounted to a structurally sound part of the vehicle, away from heat sources, moving components, and areas likely to be crushed or punctured during off-road travel.
There is no single mounting location that is safest for every vehicle. The ideal position depends on the vehicle’s design, fuel-container manufacturer instructions, available mounting points, payload limits, and local regulations.
Rear-Mounted Fuel Canriers
A dedicated rear carrier or swing-out tire carrier can be a practical location for a fuel container because it keeps fuel outside the passenger compartment and can provide a strong structural mounting point.
However, the carrier must be designed to support the fully loaded container, not just the empty can. The additional weight also changes the load on hinges, latches, carrier bearings, and mounting brackets.
Check that the fuel can:
- Cannot swing or rattle excessively
- Does not obstruct tail lights or the license plate
- Does not interfere with the rear door or hatch
- Remains clear of the exhaust system
- Is protected from unnecessary trail impacts
- Can be removed safely for refueling
Pickup Bed
A pickup bed can provide a convenient location because it keeps the fuel outside the cabin and usually offers substantial structural support.
The main consideration is how the container is restrained. A fuel can should not simply be placed loose in the bed where it can slide, tip, or be damaged by other equipment.
Use a fuel-rated container and a mounting or restraint system appropriate for that container. Keep it away from sharp cargo, tools, hot exhaust components, and other potential ignition or damage sources.
Bed Racks and Exterior Cargo Racks
A sturdy bed rack can be useful for flat modular fuel containers, provided the rack and mounting hardware are rated for the additional load.
For example, RotopaX currently specifies flat, sturdy mounting surfaces and provides mounting options for applications including bed racks, roof racks, rear panels, side rails, and truck beds. Its instructions also require the mounted container to be secured so it does not move.
The rack’s own load rating is only part of the equation. Consider the vehicle’s payload and axle limits, as well as the rack’s dynamic load capability during off-road travel.
Side-Mounted Exterior Locations
Side-mounted fuel cans can make sense when a vehicle has a purpose-built mounting system. They can also make the container easy to access.
The disadvantage is exposure. A container mounted on the side of a vehicle may be closer to rocks, trees, trail obstacles, and other objects.
Avoid locations where the container can become the first point of contact with an obstacle.
Roof Rack
A roof rack is generally not the first choice for carrying heavy portable fuel because fuel and container weight are positioned high above the vehicle.
A roof-mounted container also increases the vehicle’s center of gravity and can make loading and unloading more difficult. Off-road vibration and dynamic forces should also be considered.
If a manufacturer specifically permits roof-rack installation, the rack and mounting surface must still be structurally capable of supporting the fully loaded container. RotopaX currently lists roof racks among its possible mounting locations but emphasizes the need for a flat, sturdy surface with sufficient clearance.
For most vehicles, keep heavy fuel as low and close to the vehicle’s center of mass as practical, while still maintaining safe separation from occupants, exhaust components, and other hazards.
Inside the Passenger Compartment
The passenger compartment is generally one of the least desirable places to carry gasoline.
A leak can expose occupants to fuel vapor, while a crash can damage the container and release fuel. CPSC recommends storing portable fuel containers in cool, well-ventilated areas and keeping them closed when not in use.
If your vehicle design leaves no alternative to carrying fuel inside an enclosed cargo area, follow the vehicle and container manufacturer’s instructions and applicable regulations rather than improvising a storage arrangement.
How to Safely Store Fuel While Overlanding
Safe fuel storage begins with choosing the right container and continues throughout the entire trip. A certified fuel container can still become hazardous if it is poorly mounted, damaged, exposed to excessive heat, or repeatedly allowed to leak.
Use a Fuel-Rated Container
Only use a container specifically designed for the fuel you intend to transport.
Do not use:
- Water containers
- Household plastic bottles
- Food containers
- Improvised jugs
- Unrated chemical containers
- Damaged or modified fuel cans
In the United States, portable gasoline, kerosene, and diesel containers are subject to federal requirements. CPSC currently identifies requirements involving child-resistant packaging and flame-mitigation devices for applicable portable fuel containers.
Requirements differ between countries, so international overlanders should verify the rules applicable to their destination.
Keep the Container Closed
Keep the fuel container tightly closed whenever fuel is not actively being transferred.
CPSC specifically advises consumers never to leave portable fuel containers open and recommends keeping them in cool, well-ventilated areas.
A closed container reduces the opportunity for fuel vapor to escape and helps protect the fuel from contamination.
Keep Fuel Away From Ignition Sources
Fuel containers should be kept away from:
- Open flames
- Campfires
- Cigarettes
- Stoves
- Heaters
- Hot exhaust components
- Sparks
- Other ignition sources
Gasoline vapor is particularly hazardous because the vapor can travel away from the liquid and ignite when it encounters an ignition source. CPSC warns that escaping fuel vapor can cause flash fires and serious burns.
Protect Containers From Excessive Heat
Do not intentionally position a fuel container next to an exhaust pipe, muffler, catalytic converter, engine component, or another high-temperature surface.
External mounting does not automatically make a location safe. Before installing a container, inspect the area under normal operating conditions and consider heat generated during slow off-road driving.
Secure the Container Against Movement
Off-road vehicles experience much more vibration and shock than vehicles traveling exclusively on paved roads.
A fuel can should not be allowed to:
- Bounce
- Slide
- Rotate
- Rub against metal
- Strike another object
- Contact sharp edges
Use the manufacturer’s approved mounting system whenever possible.
Inspect for Leaks and Damage
Before every major trip, inspect the container and its hardware.
Look for:
- Cracks
- Dents that compromise the container
- Corrosion
- Damaged threads
- Worn gaskets
- Loose caps
- Damaged spouts
- Fuel odor
- Wet spots
- Abrasion around mounting points
A leaking container should not be carried as normal cargo. OSHA’s flammable-liquid rules likewise require leaking containers in regulated workplace settings to be moved to a safe location and transferred into an undamaged container.
Fill Fuel Containers Safely
When filling a portable fuel container at a fuel station, place the container on the ground rather than filling it while it is sitting inside a vehicle or on a truck bed. CPSC specifically recommends placing a gas can on the ground during filling.
After filling, close the container securely before transporting it.
Avoid Overfilling
Do not attempt to squeeze additional fuel into a container beyond its rated capacity.
Fuel expands with temperature changes, so a properly designed container needs appropriate vapor space. Follow the manufacturer’s filling instructions and never modify the container to increase its capacity.
Keep Different Fuels Clearly Identified
If your vehicle carries both gasoline and diesel, use clearly identified, fuel-specific containers.
Do not rely on memory or container color alone. Labeling and separation can prevent accidentally putting the wrong fuel into a vehicle.
Fuel Storage Mistakes Overlanders Should Avoid
Many fuel-storage problems are caused not by the container itself but by poor planning, improper mounting, or unnecessary fuel capacity.
Carrying More Fuel Than Necessary
More fuel means more weight.
That additional weight can increase fuel consumption and affect braking, suspension, handling, and payload capacity.
Calculate the actual reserve required for the route before purchasing containers.
Using an Unapproved Container
A cheap plastic jug may look suitable but may not be designed to contain gasoline or diesel.
Use a fuel-specific container that meets the requirements applicable to your location.
Carrying Fuel Loose in the Vehicle
A loose fuel can can become a dangerous projectile during hard braking, a rollover, or an off-road impact.
Always secure it against movement.
Storing Gasoline Inside the Passenger Area
A fuel leak inside an enclosed cabin can expose occupants to fuel vapors.
Whenever practical, use an exterior mounting location designed for the container.
Mounting Fuel Too Close to the Exhaust
This is one of the most important mounting mistakes to avoid.
Measure the clearance from the container to exhaust components and consider heat generated during slow, difficult off-road driving.
Mounting Too Much Weight on the Roof
Roof storage is convenient but adds weight high on the vehicle.
Multiple full fuel cans can significantly increase roof load and vehicle center-of-gravity height. Verify both the roof-rack and vehicle limits before using this arrangement.
Using Weak Mounting Hardware
A container can weigh considerably more when full.
The mount needs to support the loaded weight plus the forces generated during off-road travel, not merely the static weight of an empty container.
Ignoring Payload Limits
Fuel weight is easy to overlook because it is often treated as “just emergency equipment.”
Calculate:
Fuel + container + mounting hardware + accessories = added payload
Then compare the result with the vehicle’s payload and axle limits.
Mixing Fuel Types
Using the same unmarked container for gasoline and diesel can create confusion and contamination.
Keep containers dedicated to their intended fuel unless the manufacturer specifically provides cleaning and compatibility instructions that permit another use.
Modifying a Fuel Container
Do not drill holes, add homemade vents, weld fittings, install improvised taps, or otherwise modify a fuel container unless the manufacturer specifically provides an approved modification procedure.
Changing the container can compromise its structural integrity or safety features.
Ignoring Local Regulations
Fuel-transport rules can vary by country, state, province, park, ferry operator, and even individual protected areas.
Before an international or remote trip, check the rules that apply to your route rather than assuming that a container legal in one jurisdiction is automatically acceptable everywhere.
Failing to Inspect the System During the Trip
A mounting system that looks secure in the driveway can loosen after hours of vibration.
Make fuel-container inspection part of your regular camp or vehicle check, especially after particularly rough terrain.
Frequently Asked Questions About Overlanding Fuel Storage
How much extra fuel should I carry for overlanding?
Carry enough extra fuel to cover the longest distance between reliable fuel stops under your expected driving conditions, plus a reasonable reserve.
A useful starting calculation is:
Extra fuel needed = required trip fuel − usable main-tank fuel
Estimate required trip fuel using your real-world MPG rather than the manufacturer’s advertised figure.
For example, if a remote section is 300 miles and your loaded vehicle realistically achieves 15 MPG:
300 ÷ 15 = 20 gallons
Adding a 20% planning reserve gives approximately 24 gallons of total fuel for that section. You would then subtract the usable fuel already available in your main tank.
The correct reserve depends on terrain, weather, fuel availability, route reliability, and how remote the trip is.
What is the best fuel storage container for overlanding?
For most overlanders, the best choice is a high-quality, fuel-rated portable container with a secure mounting system.
Choose a flat modular container when exterior space is limited, a steel jerry can when ruggedness is the priority, and an auxiliary tank when you regularly require substantial additional range.
The best container is the one that matches your fuel type, required capacity, vehicle payload, mounting space, and trip conditions.
Are plastic or metal jerry cans better?
Neither is universally better.
Plastic containers are generally lighter and corrosion-resistant, making them attractive for vehicles where payload is limited.
Steel jerry cans offer rugged construction and can be excellent for demanding use, but they are heavier and require more attention to corrosion.
For a lightweight overlanding build, quality plastic may be preferable. For a heavy-duty expedition setup where weight is less restrictive, steel can be worthwhile.
Are RotopaX fuel cans worth it?
They can be worth the higher price if space-efficient exterior mounting and modularity are important to your vehicle.
RotopaX’s current system supports 1-, 2-, 3-, and 4-gallon fuel containers with dedicated mounting options, including flat-surface and roll-bar configurations. The manufacturer recommends mounting on a sturdy surface with adequate clearance and checking that the container is secure with no movement.
The main downside is cost: you are purchasing both the container and a compatible mounting system.
They make the most sense when a conventional jerry can would be awkward to mount or would consume too much usable space.
Can you store gasoline in a jerry can?
Yes, if the jerry can is specifically designed and approved for gasoline and is used according to the manufacturer’s instructions.
Do not assume that every container with a “jerry can” shape is gasoline-safe.
In the United States, applicable portable fuel containers are subject to requirements covering safety features such as flame mitigation and child-resistant packaging.
Is it safe to carry a fuel can on a roof rack?
It can be done with an appropriate vehicle, container, and mounting system, but a roof rack is not automatically the safest location.
The main concerns are:
- Added high-mounted weight
- Roof-load limits
- Dynamic off-road loads
- Difficult loading and unloading
- Exposure to heat and weather
- Potential effects on vehicle stability
If the container manufacturer permits roof-rack mounting, use the specified mounting hardware and verify that the rack and vehicle can safely support the fully loaded container. For example, RotopaX lists roof racks as an approved mounting location for its system when installed on a flat, sturdy surface with adequate clearance.
For heavy fuel loads, keeping the weight lower on the vehicle is generally preferable when a safe, structurally appropriate mounting location is available.
Where is the safest place to mount a fuel can?
For many overlanding vehicles, a secure exterior location away from occupants, exhaust heat, moving components, and likely impact zones is preferable.
A purpose-built rear carrier, pickup bed, or appropriate exterior rack can work well.
The exact location depends on the vehicle. The safest mount is not necessarily the lowest or the highest—it is the location where the container can be securely supported while maintaining appropriate clearance, vehicle load limits, and access.
How long can gasoline be stored in a fuel can?
There is no single guaranteed storage period for gasoline because fuel formulation, temperature, humidity, container condition, and storage practices all affect its usable life.
For overlanding, it is better to treat portable gasoline as short- to medium-term reserve fuel rather than something to leave indefinitely in a vehicle.
If gasoline must be stored for an extended period, follow the fuel and fuel-stabilizer manufacturer’s instructions and use a container approved for the fuel.
A practical approach for expedition vehicles is to rotate stored fuel regularly: use the reserve fuel during normal driving and replace it with fresh fuel before it becomes old.
Can I carry a fuel can inside my vehicle?
It is generally preferable to carry gasoline outside the passenger compartment whenever the vehicle design allows a safe exterior mounting option.
CPSC recommends storing portable fuel containers in cool, well-ventilated areas and warns about the fire hazard from escaped fuel vapor.
If an enclosed cargo area must be used, follow the vehicle and container manufacturer’s instructions and applicable laws. Do not place a fuel can loose among passengers, luggage, or camping equipment.
What size fuel can is best for overlanding?
There is no universal best size.
A smaller container is easier to lift, carry, and distribute across multiple mounting points. A larger container reduces the number of containers and mounts required but becomes heavier when full.
For many overlanders, 2- to 5-gallon containers offer a practical balance, but the correct size should be determined by the required reserve and vehicle payload.
For example, if your calculated additional requirement is about 6 gallons, two smaller containers may be easier to manage than one large container.
Do I need a fuel stabilizer for overlanding?
Not necessarily if the fuel will be used relatively soon.
A fuel stabilizer can be useful when gasoline will be stored for an extended period, but it does not make old or contaminated fuel permanently usable.
If you use a stabilizer, choose one specifically compatible with your fuel and follow its dosage and storage instructions. The stabilizer should be added when the fuel is fresh rather than used as a way to “restore” fuel that has already degraded.
For frequently used overlanding reserves, regularly rotating the fuel can be simpler than storing the same gasoline indefinitely.
How do I prevent fuel cans from leaking?
Start with a container specifically designed for your fuel and inspect it before every trip.
To reduce leakage risk:
- Keep the cap and gasket clean
- Tighten closures according to manufacturer instructions
- Do not overfill
- Do not modify the container
- Keep the container upright unless the manufacturer specifically permits another orientation
- Secure the container against movement
- Protect it from sharp edges and abrasion
- Replace damaged seals or components
- Remove damaged containers from service
CPSC recommends keeping portable fuel containers closed when not in use, while proper mounting prevents vibration and impact from damaging the container.
Can I use the same fuel can for gasoline and diesel?
Do not assume that one container can be freely switched between gasoline and diesel.
The safest approach is to dedicate each container to one fuel type and label it clearly. If you need to change fuel types, follow the container manufacturer’s specific compatibility and cleaning instructions.
This avoids cross-contamination and reduces the risk of putting the wrong fuel into your vehicle.
Remember that gasoline and diesel have different characteristics, and a container’s approval should be based on the manufacturer’s stated fuel compatibility rather than its material or appearance alone. CPSC’s current portable-fuel-container guidance explicitly distinguishes liquid fuels including gasoline and diesel within its regulatory framework.
Read More: Sleeping Arrangements: Vehicle Tents and Setups for Overlanding