A reliable sleeping arrangement is one of the most important parts of a comfortable overlanding trip. After spending hours driving on rough roads, exploring remote areas, or dealing with changing weather, having a secure and comfortable place to sleep can make the difference between waking up refreshed and starting the next day exhausted. Your sleeping setup also needs to work with your vehicle, available camping space, climate, gear, and the way you travel.
Overlanding vehicle tents offer one practical solution by turning your vehicle into part of the campsite. Rooftop tents can elevate the sleeping area above uneven or wet ground, while truck-bed tents use the cargo bed as a dedicated sleeping platform. SUV- or vehicle-attached tents can expand usable living space, and conventional ground tents remain a flexible and often more affordable option. Some overlanders also choose to sleep inside their SUV or van, particularly when they prioritize a low-profile setup or want better protection from cold weather.
Each option involves trade-offs. Rooftop tents provide an elevated sleeping platform and quick campsite setup but add weight and height to the vehicle. Ground tents offer more flexibility and usually cost less but require a suitable campsite and more ground preparation. Truck-bed tents make efficient use of a pickup’s cargo area but are limited to compatible truck configurations. Sleeping inside the vehicle provides excellent protection from wind and rain, although interior space can be restrictive.
This guide compares these sleeping arrangements, explains what to look for when choosing overlanding vehicle tents, and covers the equipment, setup considerations, common mistakes, and practical factors that can help you select a sleeping solution that fits your vehicle and travel style.
What Are Overlanding Vehicle Tents?
Overlanding vehicle tents are camping shelters designed to work with or around a vehicle, creating a dedicated sleeping area for extended road-based adventures. Unlike a conventional tent that stands independently on the ground, a vehicle tent either mounts to the vehicle, fits into a truck bed, attaches to the vehicle’s side or rear, or otherwise uses the vehicle as part of the sleeping setup.
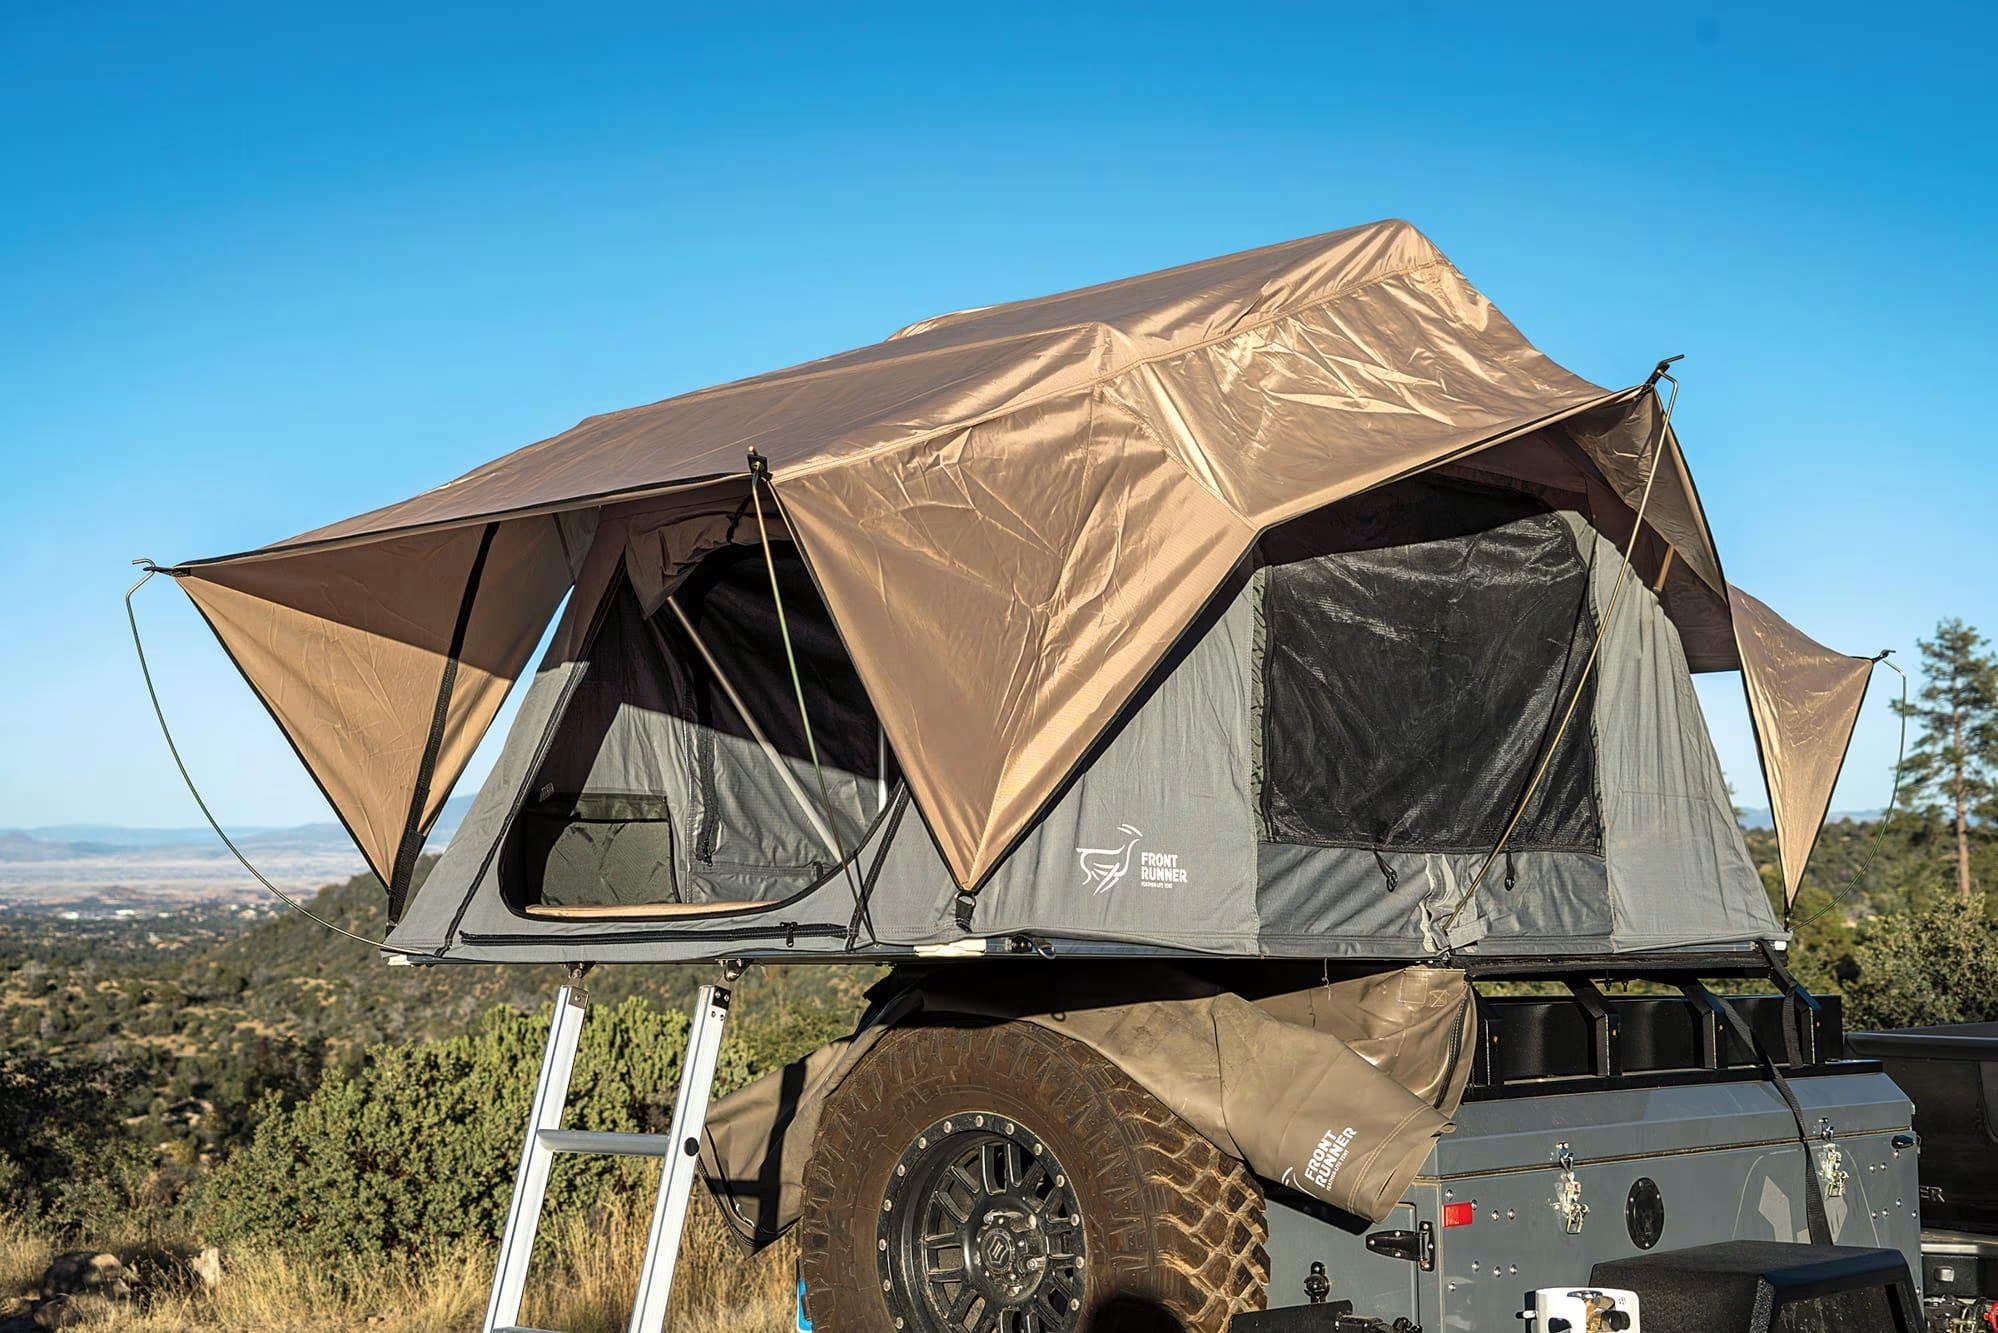
The most recognizable example is the rooftop tent (RTT). It mounts to a roof rack or another compatible mounting system and unfolds to create an elevated sleeping platform. Depending on the design, rooftop tents can be hard-shell or soft-shell, with different opening mechanisms, mattress configurations, storage options, and weather protection.
However, “vehicle tent” is a broader category. Pickup owners can choose truck-bed tents that occupy the cargo bed without requiring a rooftop sleeping platform. SUV owners can use rear- or side-attached tents to create additional sheltered space outside the vehicle. Other overlanders may simply configure the vehicle interior with a sleeping platform and mattress.
A key consideration is that vehicle compatibility comes before tent selection. A tent’s advertised capacity does not automatically mean it is suitable for every vehicle. You need to consider the vehicle manufacturer’s roof-load specifications, the rack or mounting system’s limits, the tent’s weight, the number of occupants, and the dynamic versus static load requirements specified by the relevant manufacturers.
It is also important to distinguish between a tent’s sleeping capacity and its practical comfort. A two-person tent may technically accommodate two adults, but mattress width, interior height, personal gear, sleeping positions, and climate can significantly affect how comfortable it feels during a multi-day trip.
The right setup therefore depends on more than simply finding the largest or most expensive tent. Consider:
- Vehicle compatibility: Make sure the mounting system, rack, truck bed, or vehicle interior can safely accommodate the setup.
- Sleeping capacity: Choose enough space for the actual number of occupants and their sleeping gear.
- Weather conditions: Consider rain, wind, heat, cold, humidity, snow, and condensation.
- Setup and teardown: A complicated system can become frustrating when moving campsites frequently.
- Packed dimensions: Roof-mounted equipment can increase vehicle height, while bulky ground equipment consumes cargo space.
- Weight: Additional equipment affects payload and, for roof-mounted systems, the vehicle’s center of gravity.
- Comfort: Mattress thickness, ventilation, interior space, and access can matter more than appearance.
- Storage: Consider where bedding, clothing, recovery equipment, cooking gear, and other supplies will go.
- Camping style: A stationary base camp has different requirements from a trip involving frequent overnight moves.
In short, overlanding vehicle tents are not a single type of camping product. They are part of a wider range of vehicle-based sleeping solutions designed to make remote travel more practical and comfortable.
Types of Overlanding Vehicle Tents and Sleeping Setups
There is no universally best sleeping arrangement for overlanding. The right choice depends on your vehicle, destination, weather, number of travelers, camping frequency, budget, and how much equipment you are willing to carry.
1. Rooftop Tents

Rooftop tents are among the most recognizable overlanding vehicle tents. They mount above the vehicle, typically on a suitable roof rack or platform, and provide an elevated sleeping area.
There are two broad designs: soft-shell rooftop tents and hard-shell rooftop tents.
Soft-shell models generally fold out from a larger fabric-covered base and may provide a relatively spacious sleeping area. Some include an annex that extends downward from the tent to create additional sheltered space. Hard-shell models use a rigid upper shell and typically open upward or at an angle. Their streamlined packed profile can make them attractive to overlanders who frequently travel between campsites.
The biggest benefit is the elevated sleeping platform. You don’t have to sleep directly on the ground, which can be useful when the campsite is damp, uneven, rocky, or occupied by insects. A rooftop tent can also keep the sleeping area physically separated from some ground-level conditions.
Many modern models include integrated mattresses, built-in ventilation panels, insect screens, interior lighting, and storage pockets. Some can remain partly prepared with bedding, reducing the amount of equipment that has to be unpacked every night.
The main drawback is the additional weight and height added to the vehicle. A rooftop tent can affect the vehicle’s handling and fuel consumption, while its packed height can become an important consideration in parking garages, wooded trails, low-clearance areas, and some ferry or transport situations.
You also need to climb a ladder to access the sleeping area. That can be inconvenient during nighttime trips outside the tent or for travelers with mobility limitations.
Most importantly, the vehicle and mounting system must be compatible with the tent. Don’t assume that because a roof rack physically fits the vehicle, it automatically has sufficient capacity for the tent and occupants.
Rooftop tents are particularly appealing to travelers who change campsites frequently and want a dedicated sleeping area that can be deployed without finding a perfectly suitable patch of ground.
2. Truck Bed Tents

Truck-bed tents are designed to use the cargo bed of a pickup as the foundation for the sleeping area. Instead of placing the tent on the roof, the shelter sits within or around the truck bed.
This arrangement can be an effective middle ground for pickup owners. The sleeping surface is elevated from the ground while avoiding the need to place the entire tent on the roof.
A major advantage is that the truck bed provides a defined platform for sleeping. Depending on the design and truck configuration, occupants may get more usable space than with some compact rooftop tents.
Truck-bed tents also tend to have a lower overall profile than rooftop tents, although the exact packed and deployed dimensions vary significantly between products.
However, compatibility is especially important. Truck-bed dimensions, wheel-well placement, tailgate configuration, bed caps, tonneau covers, and other accessories can affect whether a particular tent fits properly.
Another consideration is cargo access. Once the tent is installed, part or all of the truck bed may no longer be available for equipment. You may need a separate storage system for recovery gear, coolers, cooking equipment, tools, and other overlanding essentials.
Truck-bed tents are best suited to pickup owners who want an elevated sleeping area without committing to a rooftop tent.
3. SUV and Vehicle-Attached Tents

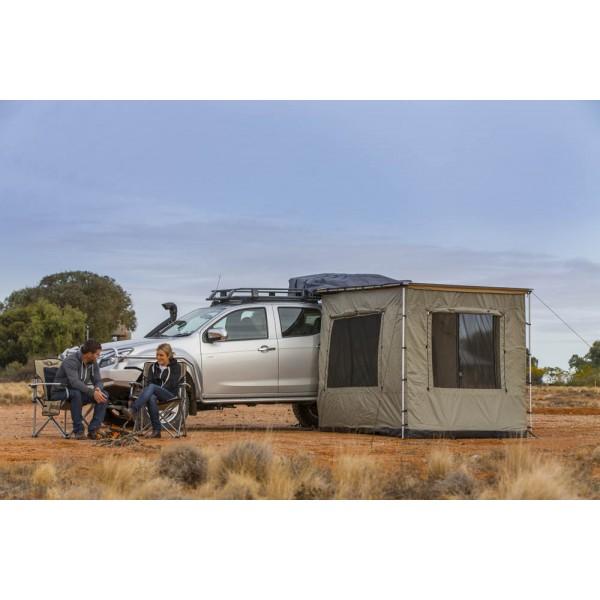
SUV- and vehicle-attached tents connect to the vehicle while creating additional sheltered space around it. Depending on the design, the tent may attach to a rear hatch, tailgate, side door, awning, or another part of the vehicle.
These setups can be especially useful when the vehicle serves as the center of a campsite. Rather than treating the vehicle and tent as completely separate areas, the attached shelter can create a transition between indoor and outdoor living space.
Some designs focus primarily on expanding covered living space, while others can provide an enclosed sleeping area. This makes them useful for families, groups, or overlanders who want additional room for changing clothes, cooking under shelter, relaxing, or storing gear.
One advantage is that you can often retain a lower vehicle profile than with a rooftop tent. Depending on the design, vehicle-attached tents can also provide significantly more usable floor area.
The trade-off is that they usually require a suitable vehicle position and more ground area around the vehicle. Their setup may also involve more poles, guy lines, stakes, or attachment points than a hard-shell rooftop tent.
For travelers who value living space as much as sleeping space, a vehicle-attached tent can be a highly practical option.
4. Ground Tents for Overlanding

A conventional ground tent remains one of the most versatile sleeping solutions for overlanding. It does not require a special roof rack or vehicle-specific mounting system, and it can be used independently of the vehicle.
This flexibility is a major advantage. You can park the vehicle separately from the tent, establish a larger campsite, and choose from a wide range of tent sizes and designs. Ground tents are also generally easy to replace or upgrade without changing the vehicle’s configuration.
For travelers who spend several nights at one campsite, a ground tent can be particularly convenient. You can leave the tent standing while using the vehicle for day trips, provided the campsite rules and conditions allow it.
The downside is that site selection matters more. You need relatively suitable ground for pitching the tent and driving stakes or using alternative anchoring methods. Rain can create drainage problems, while rocks, roots, mud, insects, and uneven surfaces can reduce comfort.
Ground tents also generally require more deliberate campsite preparation than a vehicle-mounted sleeping system.
Still, their combination of flexibility, variety, and generally lower cost makes ground tents an excellent option for overlanders who don’t need an elevated sleeping platform.
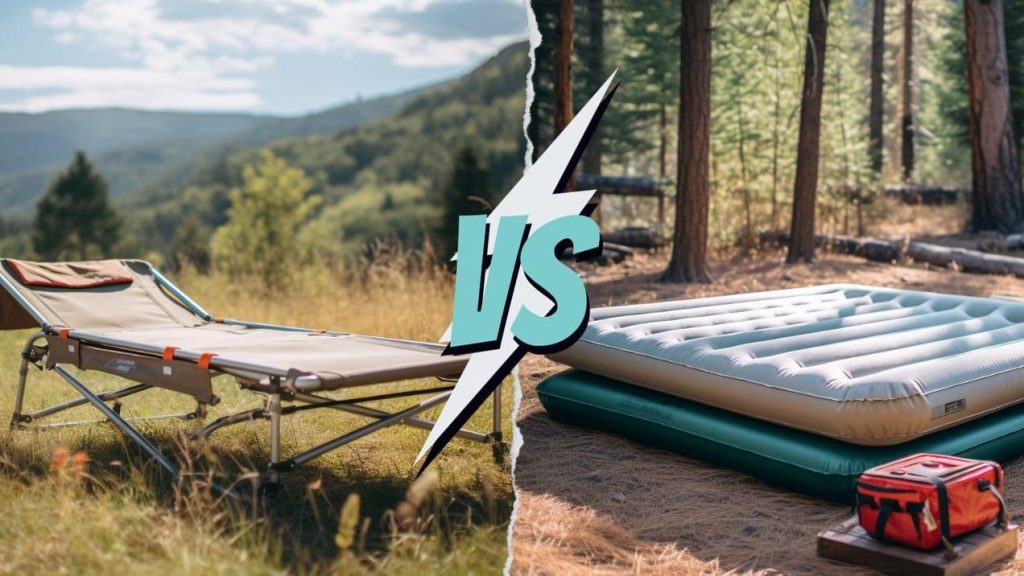
5. Sleeping Inside the Vehicle

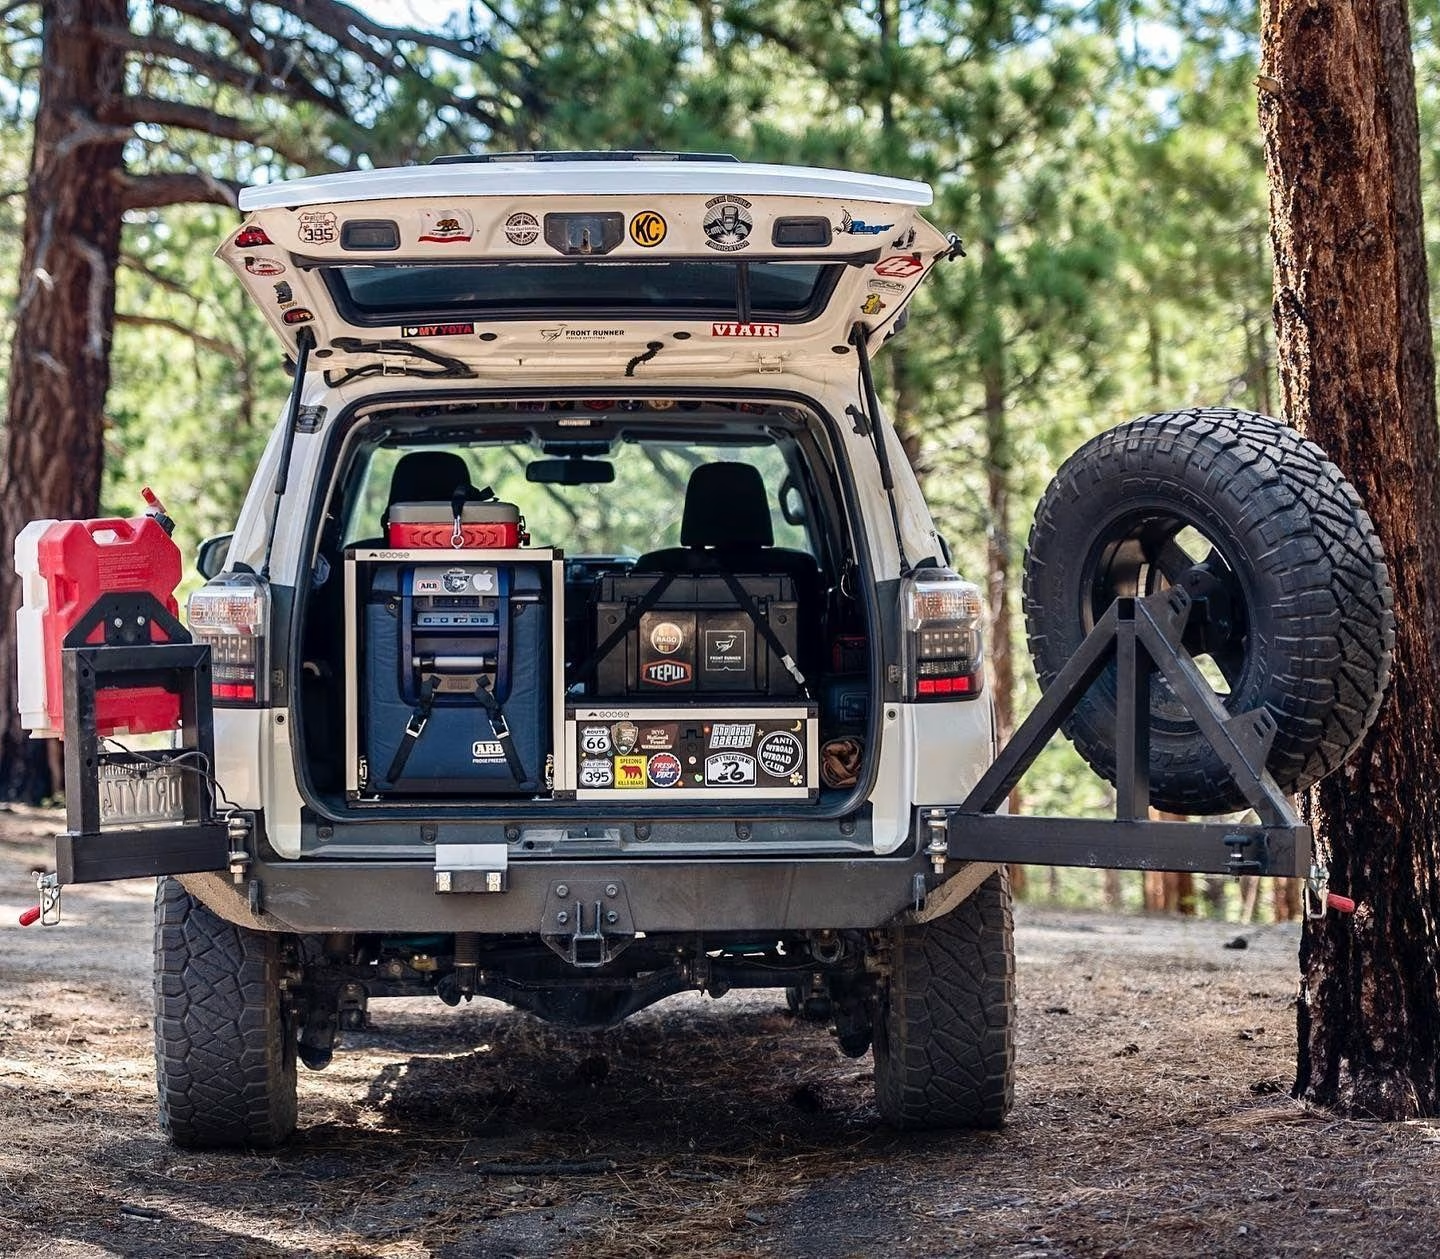
Sleeping inside the vehicle is another popular approach, particularly among SUV and van owners. The rear seats can be folded or removed where appropriate, and a dedicated sleeping platform or mattress can be installed to create a relatively flat sleeping surface.
The biggest advantage is protection. The vehicle provides a solid barrier against rain, wind, and some environmental exposure. You also don’t have to erect a separate tent, which can make short overnight stops much faster.
A vehicle interior can also provide better security for personal belongings and maintain a lower profile at camp. For travelers who regularly camp in cold or wet conditions, the enclosed environment can be appealing.
However, interior sleeping has clear limitations. Available space depends heavily on the vehicle’s dimensions and layout. Headroom can be limited, condensation can become a significant issue, and sleeping inside the vehicle reduces the cargo space available for other equipment.
Ventilation is particularly important. Opening windows or vents can improve airflow and reduce condensation, but openings need to be managed appropriately for weather and insect conditions. Travelers should also follow the vehicle manufacturer’s guidance regarding idling and never rely on a running engine to provide heat inside an occupied vehicle.
Sleeping inside the vehicle can be ideal for solo travelers, couples with suitable vehicle interiors, minimalist campers, and people who prioritize weather protection and a low-profile setup.
Comparing the Main Sleeping Options
| Sleeping setup | Main advantage | Main limitation | Best suited for |
|---|---|---|---|
| Rooftop tent | Elevated, dedicated sleeping area | Adds roof weight and vehicle height | Frequent campsite changes |
| Truck-bed tent | Uses pickup bed as sleeping platform | Limited to compatible pickups | Pickup overlanders |
| Vehicle-attached tent | Expands sheltered living space | Requires additional campsite area | Families and longer stays |
| Ground tent | Flexible and generally economical | Requires suitable ground | Versatile camping |
| Inside vehicle | Strong weather protection and quick setup | Limited interior space and ventilation challenges | Minimalist or low-profile travel |
Ultimately, choosing among these overlanding vehicle tents and sleeping setups is less about finding a universally superior design and more about matching the system to your vehicle and travel habits. A traveler who moves every night may prioritize rapid deployment, while someone establishing a base camp for several days may value interior space and a larger sheltered living area.
Essential Features to Look for in an Overlanding Vehicle Tent
Choosing an overlanding vehicle tent involves more than comparing sleeping capacity or price. A tent that looks impressive in a showroom may not be the right choice for long-distance travel, rough roads, or changing weather. Before buying, consider how the tent will interact with your vehicle, how quickly it can be deployed, how well it handles moisture and wind, and whether replacement parts will remain available.
For rooftop tents in particular, vehicle and rack compatibility should be checked before anything else. The tent, mounting hardware, and rack need to remain within the vehicle and rack’s applicable dynamic load limits while driving. Static capacity is a separate consideration when the vehicle is parked and occupied. Manufacturers and rack suppliers also specify compatible mounting systems and crossbar spacing, so don’t assume that a rack that fits your vehicle is automatically suitable for a rooftop tent.
Durable, Weather-Resistant Materials
Overlanding exposes camping equipment to considerably more abuse than occasional campground use. Look for fabrics, poles, hinges, zippers, mounting hardware, and stitching designed for repeated outdoor use.
Tent fabric should provide adequate resistance to UV exposure, rain, wind, and abrasion. Synthetic fabrics are common because they offer a useful balance between weight, durability, and weather resistance. For hard-shell tents, pay attention to the shell material and the quality of its hinges, latches, seals, and gas struts.
The strongest-looking material isn’t necessarily the best choice. A heavier tent adds weight to the vehicle, so durability should be balanced against total system weight.
Waterproofing and Seam Protection
A tent can have water-resistant fabric and still leak through poorly protected seams, zippers, attachment points, or penetrations.
Look for features such as:
- Waterproof or water-resistant tent fabric appropriate for the intended climate
- Properly sealed or protected seams
- Storm flaps over vulnerable zippers
- Durable floor construction
- Effective rainfly coverage where applicable
- Sealed entry points around windows and doors
- Drainage paths that prevent water from collecting around openings
Don’t judge waterproofing solely by a manufacturer’s headline water-resistance specification. The design of the complete shelter matters, including how the roof, walls, floor, doors, and seams work together.
For extended overlanding, inspect the tent periodically rather than waiting for a leak to appear. Small fabric tears, worn seam treatments, damaged seals, or loose mounting hardware can become much bigger problems during a storm.
Ventilation and Windows
Good ventilation is essential for both comfort and condensation control. Sleeping occupants release moisture through breathing and perspiration, and that moisture can condense on cooler tent surfaces when airflow is inadequate.
Prioritize tents with strategically positioned windows, roof vents, mesh panels, or other ventilation openings. Ideally, the design should allow air to move through the shelter without leaving large openings that expose the sleeping area to insects or rain.
A useful setup should let you adjust airflow according to conditions. On a warm night, you may want maximum cross-ventilation. During colder weather, you may need smaller openings that maintain airflow while limiting heat loss.
Mattress Quality
A rooftop or vehicle tent is only as comfortable as its sleeping surface. Since many rooftop tents include a built-in mattress, examine its thickness, density, dimensions, and ability to support the occupants rather than treating the mattress as an incidental accessory.
Consider:
- Mattress thickness and firmness
- Sleeping surface dimensions
- Edge support
- Condensation resistance beneath the mattress
- Whether the mattress can be removed for cleaning
- Whether replacement mattresses are available
A mattress that feels comfortable for a quick test in a showroom may feel very different after several consecutive nights. If possible, test the sleeping surface before purchasing.
Entry and Exit Design
Getting in and out of the tent repeatedly is part of everyday use, so entry design matters. Look at the opening’s width, zipper operation, door orientation, step height, and how easily the entrance can be accessed at night.
For rooftop tents, consider how the entrance interacts with the ladder and the vehicle’s surroundings. A tent may be spacious inside but awkward to enter if the ladder position conflicts with the vehicle, awning, cargo box, or campsite layout.
A well-designed entry should also allow you to close the opening securely against insects and weather without creating unnecessary difficulty.
Ladder Quality and Adjustability
For rooftop tents, the ladder is a structural component rather than merely an accessory. It should feel stable when climbing and should be appropriate for the tent’s deployed height.
Look for:
- Strong ladder construction
- Secure attachment to the tent
- Adjustable length where necessary
- Stable feet
- Locking mechanisms that prevent unwanted movement
- Adequate weight capacity
- Comfortable steps
Make sure the ladder can be positioned on the type of terrain where you expect to camp. A tent may be perfectly level while the ground beneath one side of the ladder is uneven, so adjustability can make a substantial difference.
Interior Storage
Small storage features can make a big difference inside a compact sleeping space. Interior pockets, hanging organizers, gear loops, and dedicated storage areas can keep phones, flashlights, glasses, clothing, and other nighttime essentials within reach.
Avoid choosing a tent based solely on the number of storage pockets. Consider whether they are positioned where you can actually reach them from the sleeping area.
Annex or Extended Living Space
An annex can turn the area beneath a rooftop tent into additional sheltered space. Depending on the design, it may be used for changing clothes, storing gear, or creating a more private transition area between the tent and ground.
However, an annex adds material, weight, and setup time. It can also require additional ground space and anchoring points.
If you frequently move campsites every day, a simpler setup may be more practical. If you establish camp for several nights, the additional living space can be much more valuable.
Mosquito and Insect Protection
Mesh screens are particularly important in warm and humid environments. They allow airflow while helping keep mosquitoes and other insects outside the sleeping area.
Inspect the mesh carefully for:
- Fine enough openings for the insects common in your destination
- Secure attachment around windows and doors
- Durable stitching
- Easy-to-operate zippers
- Areas where gaps could form
Insect protection becomes especially important when ventilation requires keeping windows or doors partially open overnight.
Ease of Deployment
A tent that takes only a few minutes to deploy can significantly improve the overlanding experience, especially when you’re arriving at camp after dark or changing locations frequently.
Compare:
- Number of deployment steps
- Time required to open and close the tent
- Number of poles
- Guy-line requirements
- Ladder deployment
- Annex setup
- Bedding storage options
- Whether one person can realistically handle the process
Hard-shell rooftop tents often emphasize rapid deployment, while some soft-shell and larger tent systems may take more time because they unfold farther or use additional supports.
Don’t rely solely on a manufacturer’s advertised setup time. Your real setup time will also depend on weather, terrain, gear organization, and your familiarity with the tent.
Warranty and Replacement Parts
Overlanding equipment gets used repeatedly, so long-term support matters. Before buying, check the warranty period and understand what it covers.
Also determine whether the manufacturer supplies replacement components such as:
- Mattress covers
- Poles
- Ladder components
- Hinges
- Gas struts
- Zippers
- Tent fabric or rainfly components
- Mounting hardware
- Window mesh
- Seals and weatherproofing components
A tent with readily available replacement parts can be more practical over several years than a cheaper product that becomes difficult to repair.
What Else Do You Need for a Vehicle Tent Sleeping Setup?
Buying the tent is only the beginning. A comfortable overlanding sleeping system requires several supporting items, and the exact list depends on whether you’re using a rooftop tent, truck-bed tent, attached tent, ground tent, or vehicle interior.
1. Vehicle-Specific Mounting System
For rooftop tents, the mounting system is fundamental. The roof rack or platform must be compatible with both the vehicle and tent, and its load rating must be appropriate for the application. The combined weight of the tent and rack must stay within the applicable dynamic limit while driving.
Don’t use generic or improvised mounting hardware simply because it physically fits. Follow the tent and rack manufacturers’ installation requirements, including mounting locations, hardware, crossbar spacing, and torque specifications.
2. Sleeping Gear
Your basic sleeping kit may include:
- Sleeping bag or appropriate bedding
- Pillow
- Sleeping pad or mattress topper
- Lightweight blanket
- Fitted sheet
- Sleeping bag liner
- Headlamp or rechargeable light
Choose insulation according to the lowest temperatures you expect rather than the average daytime temperature.
3. Condensation Management
Condensation can become a significant issue in enclosed tents, particularly in cold or humid environments.
Useful measures include:
- Keeping ventilation openings appropriately positioned
- Using breathable bedding
- Avoiding unnecessary wet clothing inside the tent
- Allowing the tent to dry fully after use
- Ventilating the shelter before packing it away
- Following the tent manufacturer’s recommendations for mattress ventilation
A removable mattress or ventilation layer beneath the mattress can also make drying and cleaning easier, depending on the tent design.
4. Lighting and Power
A compact rechargeable lantern or headlamp makes nighttime setup and movement much easier. If your tent includes integrated lighting, check how it is powered and whether it can operate independently of the vehicle.
For longer trips, consider how you’ll recharge lights, phones, cameras, GPS devices, and other electronics. Your power system should be planned as part of the broader overlanding setup rather than treated as an afterthought.
5. Weather Protection
Depending on the destination, you may need additional weather-management equipment such as:
- Rainfly or storm cover
- Groundsheet
- Awning
- Guy lines
- Additional stakes
- Windbreak
- Insulating blanket
- Appropriate cold-weather sleeping gear
Don’t modify or overload the tent with aftermarket accessories unless they are compatible with the manufacturer’s design and mounting requirements.
6. Organization and Storage
Keep frequently used nighttime items accessible. A small storage pouch can hold your flashlight, phone, glasses, water bottle, and other essentials.
At the same time, avoid filling the sleeping area with unnecessary gear. Excess equipment can make movement difficult and can interfere with ventilation.
7. Basic Repair and Maintenance Kit
A practical overlanding kit should include items appropriate for the specific tent, such as spare fasteners, compatible repair materials, cleaning supplies, and tools required for routine adjustments.
Before a long trip, inspect the tent, mounting system, ladder, hinges, stitching, seals, zippers, and hardware rather than discovering a problem at a remote campsite.
How to Set Up a Vehicle Tent for Comfortable Sleeping
The exact procedure differs between manufacturers and tent types, so the manufacturer’s installation and operating instructions should always take priority. The following process provides a practical framework for setting up a vehicle-based sleeping arrangement safely and comfortably.
Step 1: Park on a Suitable Surface
Start by choosing the best available campsite.
Level ground where possible
A relatively level surface improves sleeping comfort and can make the tent more stable. With a rooftop tent, the vehicle’s position determines the orientation and level of the sleeping platform, so small adjustments to the parking position can make a noticeable difference.
For ground or vehicle-attached tents, check the area directly around the shelter as well as underneath it.
Avoid unstable or hazardous locations
Don’t position your campsite beneath dead branches, unstable trees, loose rocks, steep slopes, flood-prone areas, or other obvious hazards.
Consider drainage before settling in. A location that looks comfortable in dry weather can become problematic during heavy rain.
For rooftop tents, also consider clearance from branches and other overhead obstacles before opening the tent.
Step 2: Secure the Vehicle
Once you’ve selected the position, secure the vehicle before deploying the sleeping system.
Parking brake
Engage the parking brake and follow the vehicle manufacturer’s recommendations for securing the vehicle on the terrain.
Wheel position
On sloped terrain, position the wheels appropriately for the direction of the slope and use wheel chocks if they are appropriate for your vehicle and camping conditions.
Do not assume the tent itself will prevent vehicle movement.
Terrain considerations
Check the surface beneath the tires and consider loose gravel, mud, sand, steep gradients, and other conditions that could affect vehicle stability.
If you cannot establish a secure parking position, choose another location rather than attempting to compensate with the tent.
Step 3: Deploy the Tent
Follow the specific manufacturer’s instructions rather than improvising the deployment process.
For a rooftop tent, check that:
- The vehicle is securely parked.
- The tent’s external cover or closure system is correctly released.
- Mounting hardware remains secure.
- Hinges and opening mechanisms appear normal.
- The ladder is properly attached and positioned.
- Any support poles are correctly installed.
- The tent is fully opened and supported before entering.
If the tent has been exposed to rough roads for an extended period, inspect the mounting system before deployment. A loose fastener or damaged component should be addressed before the tent is occupied.
After installation or maintenance, many manufacturers recommend checking fasteners and hardware periodically. Follow the specific torque and inspection schedule provided with your tent and rack rather than relying on a generic torque value.
Step 4: Prepare the Sleeping Area
Once the shelter is fully deployed, prepare the sleeping area before bringing in unnecessary gear.
Mattress
Make sure the mattress is positioned correctly and that there are no objects underneath it that could create uncomfortable pressure points or interfere with ventilation.
Sleeping bags
Choose sleeping bags or bedding suitable for the expected overnight temperature. Don’t rely on the tent itself to provide warmth; the shelter primarily protects you from the surrounding environment.
Pillows
Use compact camping pillows or appropriately sized alternatives that don’t consume excessive sleeping space.
Personal gear
Keep only essential nighttime items inside the sleeping area. Place shoes, bulky bags, wet clothing, and other unnecessary equipment in an appropriate storage area when possible.
This keeps the sleeping space comfortable and can also improve airflow.
Step 5: Manage Ventilation
Ventilation is one of the most important parts of a comfortable overnight setup.
Open appropriate vents/windows
Use the tent’s built-in vents and mesh windows to establish airflow while maintaining weather and insect protection.
Avoid completely sealing a small sleeping enclosure when ventilation openings are available. Fresh airflow helps reduce humidity and condensation.
Control condensation
Condensation occurs when moisture from occupants and the surrounding air meets cooler tent surfaces. The risk increases in humid conditions and when ventilation is poor.
To reduce it:
- Maintain appropriate airflow.
- Keep wet clothing outside the sleeping area when practical.
- Avoid unnecessarily sealing every vent.
- Dry the tent thoroughly before packing it away.
- Check beneath mattresses and other areas where moisture can accumulate.
Keep insects out
Use mesh screens rather than leaving openings completely exposed. This allows ventilation without turning the sleeping area into an easy entry point for mosquitoes and other insects.
Step 6: Secure Everything Before Sleeping
Before going to sleep, perform a final inspection instead of assuming everything is secure.
Ladder
Make sure the ladder is correctly positioned, fully engaged, and stable. If the manufacturer’s instructions require a particular locking or support position, verify it before entering the tent.
Doors/windows
Close and secure openings according to the weather conditions. Maintain the ventilation needed for condensation control while ensuring rain and insects are adequately managed.
Loose equipment
Secure loose items that could move around during the night. On a rooftop tent, especially, don’t leave unnecessary objects where they could fall when the tent is accessed.
Weather protection
Check rainflys, storm covers, guy lines, poles, and other weather-related components when conditions require them. If strong winds or severe weather develop, reassess whether remaining in the tent is appropriate and follow the manufacturer’s safety guidance.
Finally, remember that comfort starts with correct preparation, but safety starts with compatibility and secure installation. For rooftop systems, the tent and rack should remain within the manufacturer’s specified vehicle and rack limits while traveling, and the mounting hardware should be inspected regularly.
Common Mistakes to Avoid With Overlanding Vehicle Tents
Choosing the right overlanding vehicle tent is not simply about finding a tent with enough sleeping space. A tent that looks ideal on paper can become inconvenient or even unsafe if it does not match your vehicle, rack, travel conditions, or camping habits. Avoiding these common mistakes can help you get better long-term value from your sleeping setup.
Choosing a Tent Without Checking Vehicle Compatibility
One of the most important mistakes is buying the tent first and checking compatibility afterward. Rooftop tents require a suitable vehicle and mounting system, while truck-bed and vehicle-attached tents have their own compatibility requirements.
Before purchasing, verify the tent’s dimensions, mounting requirements, rack compatibility, vehicle-specific restrictions, and recommended load limits. For rooftop tents, also distinguish between dynamic roof load while driving and static load when the vehicle is parked. These are not interchangeable ratings.
Ignoring Roof or Rack Weight Limits
A rooftop tent isn’t the only weight you need to consider. The complete system can include the tent, mounting hardware, roof rack or platform, occupants, and potentially other roof-mounted equipment.
Always follow the vehicle, rack, and tent manufacturers’ specifications. Do not assume that a rack’s maximum rating automatically means it can safely support every rooftop tent.
Remember that weight carried high on the vehicle can also affect handling and the vehicle’s center of gravity.
Buying Based Only on Price
A low purchase price can be attractive, but the cheapest tent isn’t necessarily the most economical option for frequent overlanding.
Consider the complete ownership cost, including:
- Mounting hardware
- Rack or platform requirements
- Mattress quality
- Replacement components
- Repairs
- Accessories
- Warranty support
- Long-term durability
A tent that lasts for years and has readily available replacement parts may provide better value than a cheaper model that requires early replacement.
Underestimating Packed Height and Weight
The tent’s dimensions when deployed are only part of the equation. Pay close attention to its packed height, width, length, and weight.
A taller roof-mounted setup can affect access to:
- Parking garages
- Covered parking
- Low bridges
- Dense forest trails
- Ferry or vehicle transport facilities
- Garage storage
Weight also matters because it contributes to the vehicle’s overall payload and, for roof-mounted equipment, changes how weight is distributed.
Ignoring Ventilation
A tent that keeps rain outside but traps moisture inside can quickly become uncomfortable.
Poor ventilation can contribute to condensation, damp bedding, uncomfortable sleeping conditions, and moisture accumulation beneath mattresses or around fabrics.
Look for adjustable vents and mesh windows, and learn how to use them according to the weather. Good airflow is especially important when two or more people are sleeping in a relatively small enclosed space.
Failing to Account for Weather Conditions
A tent designed for occasional fair-weather camping may not be the best choice for exposed overlanding routes.
Think about the environments where you expect to travel:
- Heavy rain
- High humidity
- Strong winds
- Cold temperatures
- Snow
- Intense sunlight
- Dust and sand
No tent should be treated as invulnerable to severe weather. Check the manufacturer’s operating guidance and be prepared to change locations or use a safer shelter when conditions become unsuitable.
Forgetting Setup and Teardown Time
A tent that looks simple in a product video may take longer when you’re setting it up alone in rain, darkness, or strong wind.
Consider the complete process, including opening the tent, deploying the ladder, installing poles, attaching rain protection, arranging bedding, and packing everything away.
If you change campsites every day, even a small difference in setup time can become significant over a multi-week trip.
Overloading the Tent With Unnecessary Gear
It’s tempting to store bedding, clothing, electronics, and camping equipment inside a vehicle tent. However, unnecessary weight can make the system harder to deploy and may affect the tent’s design limits.
Keep the sleeping area focused on essentials. Store heavier equipment in the vehicle or designated cargo areas unless the tent manufacturer specifically permits it.
Never exceed the tent’s stated occupancy or load limits.
Not Practicing Deployment Before a Trip
The first setup should not happen at a remote campsite after sunset.
Practice:
- Opening the tent.
- Deploying the ladder.
- Installing poles and supports.
- Adjusting ventilation.
- Arranging bedding.
- Closing and securing the tent.
- Checking the mounting hardware.
Practice also helps identify missing tools, confusing instructions, incompatible accessories, and damaged components before they become problems on the trail.
Neglecting Regular Inspection and Maintenance
Rough roads expose camping equipment to vibration, dust, moisture, and repeated movement. Regularly inspect the tent and its mounting system for loose hardware, damaged fabric, worn seals, broken zippers, corrosion, ladder problems, and other signs of wear.
Clean and dry the tent according to the manufacturer’s instructions, particularly after wet trips. Don’t pack away a wet shelter for extended periods if it can be avoided.
For rooftop tents, inspect the mounting system and rack regularly because these components carry the tent while you’re driving.
Choosing Your Ideal Overlanding Sleeping Setup
The best sleeping arrangement isn’t necessarily the most expensive, largest, or most popular option. It should fit your vehicle, travel style, destinations, occupants, and camping routine.
Start by considering how often you move between campsites. If you relocate almost every night, rapid setup and teardown should be high priorities. A rooftop tent or simple vehicle-interior setup may be more convenient than a large ground-based shelter.
Next, consider your vehicle. Pickup owners have the option of truck-bed tents, while SUVs may work well with rooftop tents, rear-attached shelters, or interior sleeping platforms. If your vehicle has limited roof capacity, an interior or ground-based solution may be more practical.
Your climate matters too. Travelers in hot and humid environments should prioritize ventilation and insect protection. Those traveling through cold or wet regions may place greater emphasis on insulation, weather resistance, condensation management, and sheltered living space.
Then consider how much living space you actually need. A rooftop tent can provide an efficient sleeping area but doesn’t necessarily give you a comfortable place to sit, cook, or change clothes. A vehicle-attached tent or ground tent can provide substantially more usable space around the vehicle.
A simple decision framework can help:
| Your priority | Setup worth considering |
|---|---|
| Fast campsite setup | Hard-shell rooftop tent |
| Elevated sleeping | Rooftop tent |
| Pickup-specific solution | Truck-bed tent |
| Large sheltered living area | Vehicle-attached or ground tent |
| Lowest vehicle profile | Ground tent or interior sleeping |
| Maximum weather enclosure | Sleeping inside a suitable vehicle |
| Frequent campsite changes | Rooftop tent or vehicle interior |
| Longer stays at one campsite | Ground or vehicle-attached tent |
| Minimal additional vehicle equipment | Ground tent |
| Minimalist solo travel | Vehicle interior or compact rooftop tent |
Also consider the total system, not just the shelter. A rooftop tent may require a suitable rack, while a ground tent may require a quality sleeping pad, groundsheet, stakes, and weather protection. Compare the complete weight, packed size, cost, setup time, and storage requirements.
Finally, think about what happens when conditions change. A sleeping setup that works perfectly on dry summer weekends may be frustrating during extended rain, cold nights, or high winds. The more varied your overlanding plans are, the more important versatility becomes.
The ideal overlanding vehicle tent is therefore the one that safely fits your vehicle, provides adequate sleeping comfort, handles the environments you expect to encounter, and doesn’t create more setup or storage problems than it solves.
Frequently Asked Questions About Overlanding Vehicle Tents
Are vehicle tents good for overlanding?
Yes. Vehicle tents can be an excellent choice for overlanding because they provide a dedicated sleeping area while allowing travelers to carry their shelter with the vehicle.
Rooftop tents are particularly useful for travelers who move frequently because the sleeping platform remains attached to the vehicle. However, they’re not automatically the best option for everyone. Ground tents, truck-bed tents, vehicle-attached tents, and sleeping inside the vehicle can all be better choices depending on your vehicle, climate, budget, and camping style.
What type of tent is best for overlanding?
There is no single best tent for every overlander.
Rooftop tents are well suited to travelers who want an elevated sleeping platform and relatively quick campsite setup. Ground tents provide greater flexibility and generally don’t require specialized vehicle mounting equipment. Truck-bed tents are useful for pickup owners, while vehicle-attached tents can provide additional living space.
If you frequently change campsites, prioritize deployment speed and compactness. If you stay several nights in one location, space and comfort may matter more.
Are rooftop tents safe in strong winds?
Rooftop tents can be used in normal wind conditions when properly installed and operated according to the manufacturer’s instructions, but they should not be treated as suitable for every wind speed or severe weather situation.
An elevated tent can be exposed to stronger airflow than a ground-level shelter. Strong gusts can place significant forces on the tent, ladder, mounting hardware, and vehicle.
If severe weather or unusually strong winds develop, follow the manufacturer’s safety guidance and consider whether the tent should be closed or whether you should relocate to a safer shelter.
Can any vehicle use an overlanding rooftop tent?
No. A rooftop tent is not automatically compatible with every vehicle.
You need to consider the vehicle’s roof-load specifications, roof-rack or platform compatibility, mounting requirements, tent dimensions, and the manufacturer’s recommendations.
Most importantly, check the dynamic roof-load limit applicable while driving and ensure the complete roof-mounted system stays within that limit. The tent also needs an appropriate mounting surface and sufficient clearance.
When in doubt, check directly with the vehicle, rack, and tent manufacturers before purchasing.
How much weight can a rooftop tent hold?
There is no universal rooftop-tent weight limit. Each model has a manufacturer-specified maximum occupancy or load capacity.
The important distinction is between the tent’s occupant capacity and the vehicle/rack’s load ratings. A tent might be designed to accommodate two or three people, but the vehicle and rack must also be capable of safely supporting the system.
Check the manufacturer’s maximum occupant/load rating and never exceed it. Also account for the weight of bedding and anything else that remains inside the tent.
Are rooftop tents waterproof?
Many rooftop tents are designed to provide substantial protection from rain, but waterproof does not mean impervious to every weather condition.
Performance depends on the tent’s fabric, seams, zippers, rainfly, shell seals, construction, and condition. Proper setup is equally important. An incorrectly installed rainfly, damaged seam, open vent, or worn seal can allow water into the sleeping area.
Before a trip, inspect the tent and make sure its waterproofing components are in good condition. Follow the manufacturer’s maintenance and weather-use recommendations.
Can you leave bedding inside a rooftop tent?
Sometimes, but it depends on the tent’s design and how much space remains when the tent is closed.
Some rooftop tents are specifically designed to accommodate bedding when packed away, while others have limited internal clearance. Thick sleeping bags, pillows, blankets, and mattress toppers can prevent proper closure or put unwanted pressure on the tent fabric and mechanisms.
Before leaving bedding inside, check the manufacturer’s instructions and make sure the tent closes completely without forcing it.
Do vehicle tents affect fuel economy?
Yes. Vehicle-mounted tents can affect fuel economy because they add weight and, particularly when mounted on the roof, can increase aerodynamic drag.
A rooftop tent creates additional frontal area and changes the airflow over the vehicle. The effect varies depending on the vehicle, tent design, speed, wind conditions, road surface, and total vehicle load.
Keeping the tent and other equipment as streamlined and lightweight as practical can help reduce the impact, but any additional roof-mounted equipment can affect efficiency.
Is a rooftop tent better than sleeping inside an SUV?
Neither is universally better.
A rooftop tent provides a dedicated elevated sleeping platform and keeps the sleeping area separate from the vehicle’s cargo area. It can also be attractive when interior space is limited.
Sleeping inside an SUV provides a lower profile and can offer greater protection from wind and rain. It also eliminates the need to climb a ladder. However, interior sleeping requires sufficient cargo space and careful ventilation.
Choose based on whether you prioritize elevated sleeping, interior space, weather protection, quick setup, vehicle height, or campsite convenience.
How long does it take to set up an overlanding tent?
Setup time varies significantly by tent design.
A simple hard-shell rooftop tent may be deployed relatively quickly, while soft-shell rooftop tents, larger ground tents, and vehicle-attached shelters can take longer because they may require additional poles, supports, guy lines, or annexes.
Manufacturer claims are useful for comparison, but your actual time will depend on experience, weather, terrain, lighting, and whether you’re setting it up alone.
The best approach is to practice the complete setup and teardown process before your first major trip.
What should I keep inside an overlanding tent?
Keep the sleeping area focused on items you need during the night, such as:
- Sleeping bags or appropriate bedding
- Pillows
- Headlamp or small light
- Phone
- Glasses
- Water bottle
- Essential personal items
- Small storage pouch
Avoid storing heavy equipment or unnecessary gear inside the tent unless the manufacturer permits it. Keep wet clothing and muddy footwear outside the sleeping area where practical.
For rooftop tents, pay particular attention to the manufacturer’s guidance about what can remain inside when the tent is closed.
How do I prevent condensation in a vehicle tent?
The most effective strategy is to manage moisture and maintain airflow.
Use the tent’s vents and mesh windows to create appropriate ventilation, even when temperatures are cool. Avoid bringing wet clothing into the sleeping area, and allow damp bedding or the tent itself to dry whenever possible.
Additional steps include:
- Ventilate before packing the tent away.
- Don’t unnecessarily seal every ventilation opening.
- Keep wet equipment outside the sleeping area.
- Check underneath the mattress for trapped moisture.
- Dry the tent thoroughly after wet-weather use.
- Use breathable sleeping gear where appropriate.
Some condensation is normal, particularly when several people sleep in a small enclosed shelter. The goal is to manage moisture rather than expect a completely condensation-free environment.
Read More: Lighting Your Campsite: Overlanding Illumination Options