Dialing in the right lighting transforms an average camp into a safe, functional, and relaxing base. Whether you’re setting up after dark, wrenching under the hood, cooking, or just winding down, the best overlanding lighting options balance brightness, power efficiency, durability, and ease of use. This guide walks you through everything: how bright you really need, which technologies and power sources make sense, smart mounting and wiring, and complete starter-to-pro setups you can copy.
Why Lighting Matters in Overlanding
Overlanding often means arriving at unfamiliar terrain with limited daylight. Good lighting directly impacts safety by reducing trips, slips, and mistakes, and makes routine camp tasks—pitching tents, prepping food, gathering gear—faster and less stressful. Lighting also enables quick recovery and repair when things go wrong at night, allowing you to spot leaks, read gauges, or re-seat a bead. Just as importantly, the right color temperature and placement can set a calm mood that helps you unwind, conserve your night vision, and avoid blasting your neighbors with harsh glare. Finally, efficient lighting saves battery capacity, which is critical on longer routes where you may not recharge for days.
Key Factors to Consider When Choosing Overlanding Lighting Options
Brightness (lumens): Lumens measure visible light output. For personal tasks, 100–300 lumens is often enough. For general camp areas, 300–1,000 lumens works well. For broad-area flood lighting or perimeter illumination, you might want 1,000–3,000+ lumens. Bigger isn’t always better—too much light can be harsh, waste power, and attract bugs.
Beam pattern: Flood beams spread light wide for camps and cooking zones. Spot beams throw light far for driving or scanning trails. Many lights combine both, or you can mix fixtures.
Color temperature (Kelvin): Warm (2700–3500K) is cozy and gentle on eyes; neutral (4000–4500K) balances color accuracy and comfort; cool (5000–6500K) looks bright and crisp for work and driving but can feel harsh at camp.
CRI (Color Rendering Index): A higher CRI (80+) helps you distinguish colors accurately—useful for reading maps, wiring, and cooking.
Durability & environmental rating: Look for rugged housings and IP ratings. IP65–IP66 resists dust and water jets; IP67–IP68 handles immersion and heavy rain. Shock resistance matters if the light lives on your roof or in your recovery kit.
Mounting & mobility: Decide where the light should live—permanent vehicle mounts, magnetic bases, clamps, tripods, or hanging from awnings/branches. Portability is key for task lights; stability is key for area and driving lights.
Power source & efficiency: LED is the default today for efficiency and longevity. Consider 12V vehicle power, USB-rechargeable packs, AA/AAA for emergencies, solar, or hybrid options.
Controls & modes: Dimming, red/amber modes, and memory (returns to last brightness) are underrated quality-of-life features.
Budget vs. reliability: Cheaper lights can be fine for casual trips, but for remote routes, proven weather sealing, efficient drivers, and solid mounts are worth the investment.
Types of Overlanding Lighting Options
Vehicle-Mounted Lighting

Light bars (roof/bumper): Great for trail illumination and setting up camp from the vehicle. Choose a combo beam (spot + flood) to see both far and wide. Ensure it’s aimed to avoid glare and legal issues on-road (often must be covered or switched off on pavement).
Ditch lights & A-pillar pods: Angled to the sides to spot branches, washouts, and animals when crawling or turning. Also useful for perimeter lighting at camp.
Rock lights (underbody): Low-output, wide-spread LEDs help tire placement at night and can softly light the immediate campsite perimeter without blinding people.
Rear work lights: Perfect for gear loading, cooking off a tailgate, or hooking up a trailer.
Awning lights: LED strips under awnings provide shadow-free task lighting for cooking and lounging.
Mounting tips: Use robust brackets matched to your rack or bumper. Add threadlocker and anti-seize where needed. Run wires in loom, protect grommet passes through body panels, and test for interference with roof tents and racks.
Portable Area Lights
Lanterns (USB-rechargeable, battery, solar): Versatile, diffused area light. Look for 300–600 lumens with adjustable brightness, a top/bottom hook or magnets, and a 4000K–4500K neutral tone.
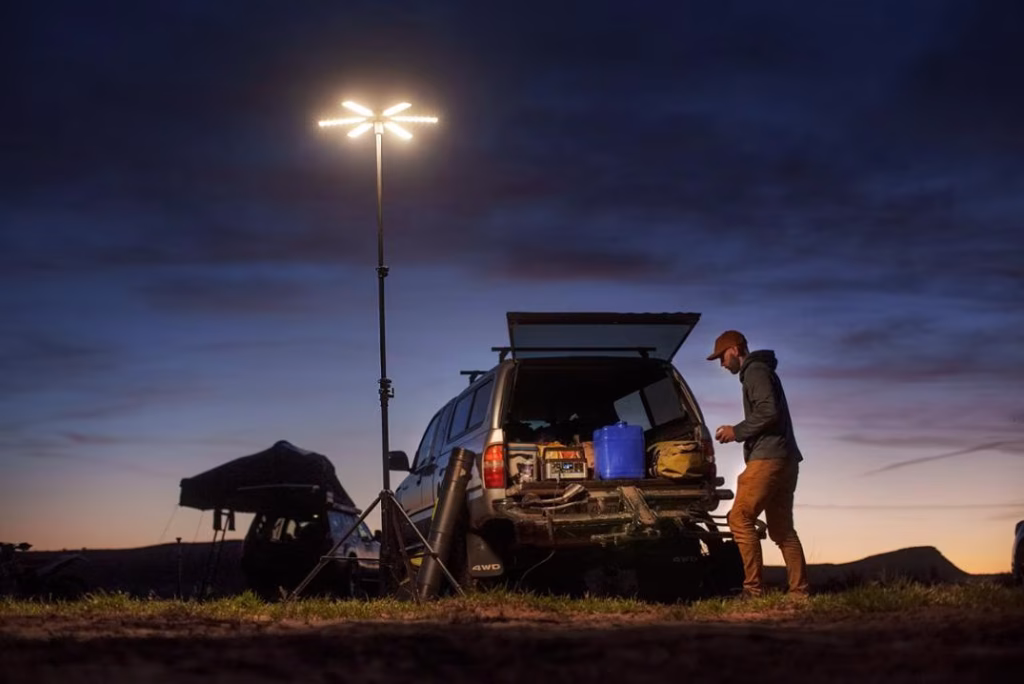
Tripod-mounted floodlights: Elevation improves coverage dramatically. A 1,000–2,000 lumen flood on a lightweight tripod can light an entire cook/setup area with fewer hotspots.
String/fairy lights: Low-power, high-ambience. Run along awnings, inside annexes, or between trees. Warm white is pleasant and less bug-attracting than cool white.
Headlamps and Personal Lighting
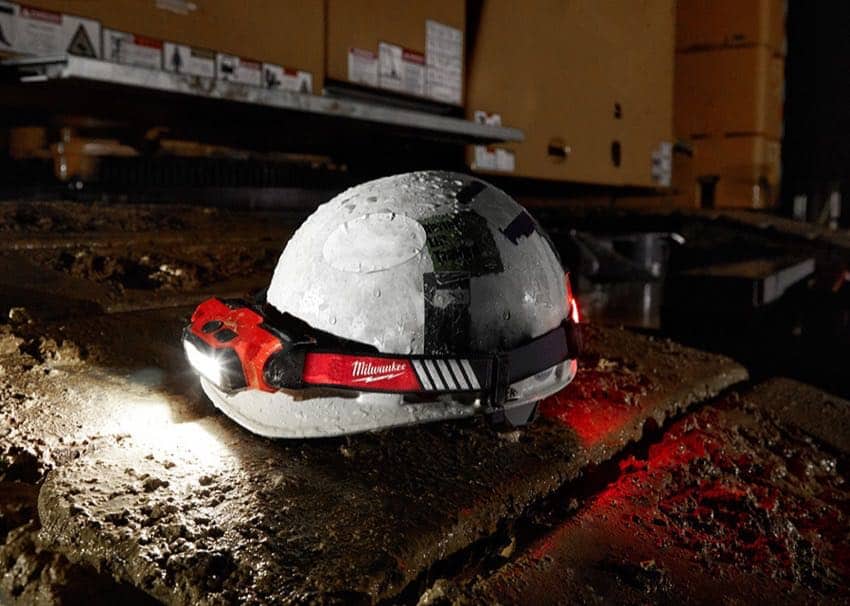
Headlamps: Hands-free is everything when you’re cooking, pitching camp, or fixing a leak. Choose 200–400 lumens with a flood beam for camp tasks and a spot boost if you hike at night. Red mode preserves night vision and is polite around campmates. USB-rechargeable lithium cells reduce disposable battery waste; a backup AAA model or spare cell is nice insurance.
Clip-on hat lights and compact task lights: Tiny but clutch for fast tasks. Magnets and rotatable heads increase usefulness.
Task-Specific Lighting
Cooking & prep zones: Diffused flood at eye level or slightly above reduces shadows. Warm to neutral white (3000–4500K) helps with food color and reduces glare.
Work lights for repairs: 500–1,500 lumens with a focused/flood blend, high CRI, and magnetic base. A slim, bar-style light slips into tight engine bays.
Tent & interior lights: Soft diffusers, low lumen settings, and warm color keep things calm. Motion-sensor puck lights are convenient at night. Inflatable solar lanterns pack tiny and are great backups.
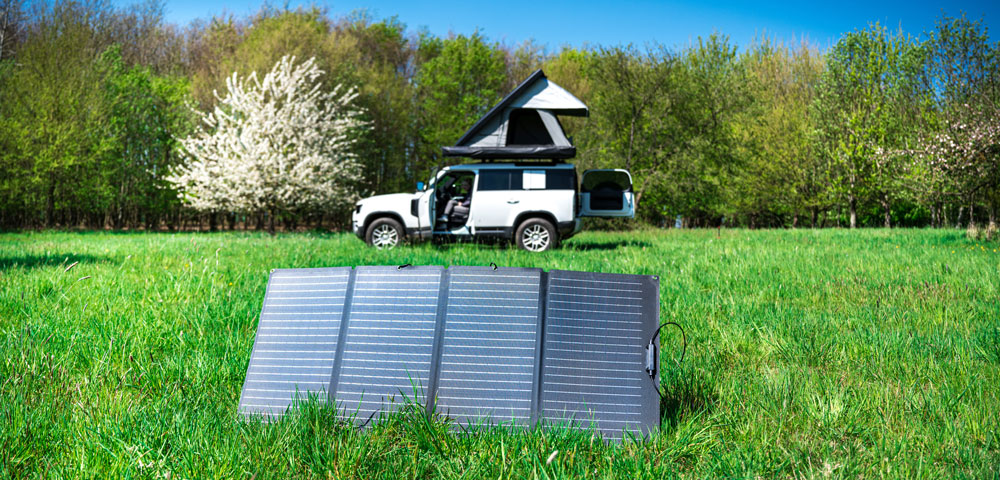
Solar-Powered and Eco-Friendly Lights
Solar lanterns, string lights, and small panels (10–30W) keep personal and area lights topped up in sunny conditions. Hybrid models offer USB charging plus solar trickle. For longer trips, pair larger panels (60–200W) with a power station or auxiliary battery to run bigger floodlights and recharge everything daily.
Comparing Popular Overlanding Lighting Technologies
LED: The standard for overlanding. Extremely efficient (often 80–150+ lumens per watt), rugged, long-lived, and available in any form factor. Excellent dimming, broad color temperature choices, and minimal heat.
Halogen: Warm color and decent throw, but very inefficient and hot, with short lifespans. Mostly obsolete for camp use but still seen in some legacy driving lights.
Fluorescent/compact fluorescent: Soft, broad illumination but fragile, bulky, and poor cold-weather performance compared to LED.
Solar lights: A power strategy, not a light type. Reliable if sized appropriately for your trip’s latitude, season, and cloud cover. Best as a complement to USB/12V charging rather than the only source.
Powering Your Overlanding Lights
Vehicle 12V system: Direct 12V is efficient. For small loads (string lights, LED strips, compact floods), a fused 12V outlet is fine. For higher draws (big light bars, multiple floods), wire directly to the battery or auxiliary battery through a fused relay harness.
Auxiliary battery systems: A dedicated house battery prevents draining your starter battery. Popular chemistries:
-
AGM (Absorbent Glass Mat): Affordable, robust, but heavier and with less usable capacity.
-
Lithium (LiFePO₄): Higher usable capacity (often ~80–90%), lighter, faster charging, excellent for frequent discharges. Needs a battery management system and proper charging profile.
Energy math (quick, reliable): -
Watt-hours (Wh) = Volts (V) × Amp-hours (Ah). A 12V 100Ah battery ≈ 1,200Wh.
-
Runtime (hours) = Battery Wh (usable) ÷ Device watts. If you run 50W of lights and have ~800Wh usable, runtime ≈ 16 hours.
-
Factor in inverter losses if you use AC (avoid when possible; stick to DC).
Solar sizing: Daily recharge target should exceed your daily use. If your lighting and gadgets use ~200Wh nightly, plan 250–400Wh solar input to account for clouds and inefficiencies. A 100W panel might harvest 300–500Wh on a sunny summer day with optimal tilt; real-world results vary by region and season.
Charging methods: -
Alternator + DC-DC charger: Safest way to properly charge an aux battery while driving, especially LiFePO₄.
-
Solar + MPPT controller: MPPT maximizes harvest and is worth it for variable light conditions.
-
Shore power AC charger: Handy at basecamps or storage.
Cables, fusing, and connectors: -
Wire gauge: Size for current draw and run length to minimize voltage drop (e.g., 10–14 AWG for many lighting circuits; heavier for long runs/high draw).
-
Fuse placement: Always as close to the battery as possible on the positive lead.
-
Relays & switches: Use relays for high-current loads; locate switches where you can reach them from camp.
-
Connectors: Anderson SB50, SAE, XT60/XT90, or quality 12V sockets. Weatherproof where exposed.
Must-Have Overlanding Lighting Setups (Beginner to Pro)
Beginner Setup (simple, affordable, reliable)
Who it’s for: Weekend trips, casual campers, new overlanders.
Components:
-
Headlamp (200–400 lumens) with red mode.
-
USB lantern (300–600 lumens) with a hook and magnet.
-
Warm white string lights (2–5W total) for awning or inside tent.
-
Power: A 10,000–20,000mAh USB power bank or your vehicle’s 12V outlet.
How to use: Hang string lights under an awning for ambient glow, keep lantern on low to medium for task areas, and wear the headlamp when moving around. Recharge from the car during drives or with a small solar panel at camp.
Why it works: Bright enough for cooking and setup, compact, and very energy efficient. Minimal wiring and zero permanent installs.
Intermediate Setup (balanced capability and comfort)
Who it’s for: Multi-day trips, shoulder-season travel, partial off-grid.
Components:
-
Two area floods on a tripod or awning (1,000–2,000 lumens each, dimmable).
-
Rear work light (vehicle-mounted) for tailgate cooking.
-
Ditch or A-pillar pods for trail approach and perimeter lighting.
-
Two headlamps and two lanterns for redundancy and teamwork.
-
Power: 12V outlet distribution, plus a small aux battery (50–100Ah AGM or LiFePO₄) and 100W solar.
How to use: Mount rear work light for tailgate tasks, deploy a tripod flood near the cooking area, and run string lights under your awning. Keep pods angled down to avoid blinding neighbors. Use dim settings most of the night to save power.
Why it works: Adds coverage, redundancy, and comfort without excessive complexity. Solar keeps small loads topped off.
Pro Setup (long-range, remote, and self-sufficient)
Who it’s for: Extended off-grid travel, group trips, and four-season routes.
Components:
-
Full perimeter lighting: rear work light, awning strips, underbody rock lights on low for campsite, and side floods.
-
High-quality light bar with combo beam for trail scanning (used responsibly and legally).
-
High-CRI task light bar for repairs.
-
Multiple personal lights (headlamps, pen lights) for each traveler.
-
Power: Dual-battery system (100–200Ah LiFePO₄), DC-DC charger, MPPT solar with 160–300W panels, and a portable power station as a flexible buffer.
How to use: Zones are everything. Put warm, diffused light where you relax; neutral task light where you cook and repair; cool, bright light only where throw and visibility matter. Label switches for each zone and add a master kill switch.
Why it works: High redundancy, low stress. Even in poor weather, you can maintain essential lighting and keep batteries healthy.
Best Practices for Overlanding Lighting
Light placement: Mount or place lights slightly above eye level and offset to reduce glare and shadows. Bounce light off awnings, tents, or reflectors for a softer effect.
Dim and diffuse: Use lower brightness and diffusers whenever possible. It saves power, preserves night vision, and keeps camps comfortable.
Use warm or amber near camp: Warm white or amber modes attract fewer bugs and are less abrasive to tired eyes.
Preserve night vision: Use red mode when reading maps or getting out of the tent. Avoid sudden blasts of cool, bright light.
Minimize light pollution: Angle lights down, turn off driving lights at camp, and use zone controls to light only what you need. Be mindful of other campers’ lines of sight.
Weatherproofing: Protect connections with heat-shrink, dielectric grease, and proper strain relief. Use IP67+ fixtures in exposed areas.
Cable management: Loom and route along factory harnesses where possible; avoid sharp edges and heat. Label circuits and keep spares of fuses and connectors.
Safety & legality: Add fuses near batteries, choose correct wire gauge, and ensure on-road legal compliance (covers for bars if required, independent switches).
Maintenance: Wipe dust and mud from lenses to restore brightness. Check mounts after corrugations. Periodically test all modes and backup lights.
Recommended Brands & Product Archetypes for Overlanding Lighting Options
While specific models change frequently, look for these proven archetypes and qualities:
Driving/trail lights & bars: Choose brands known for robust optics, efficient drivers, and real IP ratings. Combo beams with good cutoff reduce glare.
Compact flood pods: A-pillar or rack-mounted pods with interchangeable lenses (spot, flood, diffused) give you flexibility as your needs evolve.
Rear work lights & area floods: Look for wide, even distribution and high CRI for more natural color at the tailgate or repair zone.
Lanterns: Prioritize USB-C charging, adjustable warmth/brightness, magnetic bases, and hooks.
Headlamps: Flood + red mode, USB-rechargeable with replaceable cells if possible.
String/strip lights: Silicone-encased, dimmable, warm white, with sturdy clips and weatherproof connectors.
Power gear: Reputable DC-DC chargers, MPPT controllers, fused distribution blocks, labeled switches, and quality cabling.
What to avoid: Inflated lumen claims, poor thermal management (lights get dim/hot quickly), and no-name power gear without clear specs or protection features.
FAQs About Overlanding Lighting Options
How many lumens do I need for a campsite?
For a small camp kitchen or table, 300–600 lumens of diffused light works well. To illuminate a whole awning area, plan ~800–1,500 lumens spread across two fixtures to avoid glare. For a broad site or group camp, use 1,500–3,000 lumens split into zones so you can dim or switch off what you don’t need.
What color temperature is best?
Warm (2700–3500K) near living areas is comfortable and bug-friendly; neutral (4000–4500K) for true-to-life color at the cook station; cool (5000–6000K) for trail spotting and long-throw work. If you only pick one, neutral white is a good compromise.
Are solar lights reliable for long trips?
Yes—if sized correctly and paired with storage. Use solar for topping up lanterns, headlamps, and string lights. For consistent results in mixed weather, back solar with alternator charging (DC-DC) and a sufficient battery bank.
Can I run my lights directly off my car battery?
You can, but it risks draining the starter if you overdo it. Many campers run low-draw lights for short periods from the main battery with a fused circuit. For regular or extended lighting, an auxiliary battery is safer and more reliable.
What’s the most versatile setup for beginners?
A headlamp + USB lantern + warm string lights covers 90% of camp tasks, uses very little power, and packs small. Add a rear work light if you cook from the tailgate.
How do I size wire and fuses?
Check the current draw of your lights, choose a wire gauge that limits voltage drop to <3% over the run length, and fuse slightly above the expected current (but below wire capacity). Always place the fuse near the power source.
Do I need high-CRI lights?
Not mandatory, but high-CRI (80–90+) improves color accuracy for cooking and repairs. Many quality area floods and work lights list CRI in their specs.
Are amber lights worth it?
Amber cuts glare in dust, fog, and snow and attracts fewer insects. They’re excellent for ditch pods, marker/perimeter lights, and some awning strips.
What about motion sensors and timers?
Motion-activated tent or cargo lights are great at night and reduce wasted power. Timers prevent accidentally leaving lights on while you sleep.
Sample Shopping Lists by Use Case
Weekend Warrior (2–3 nights)
-
1× headlamp (USB-rechargeable)
-
1× USB lantern (300–600 lumens, warm/neutral)
-
1× 5–10m warm string light for the awning
-
Optional: 1× small magnetic work light (500–800 lumens)
-
Power: 20,000mAh power bank + vehicle 12V outlet
Family Basecamp
-
2× headlamps + 2× lanterns
-
1× tripod flood (1,000–2,000 lumens, dimmable)
-
1× rear work light (vehicle-mounted)
-
1× warm string light + 1× neutral task light for kitchen
-
Power: 50–100Ah aux battery + 100W solar
Extended Remote Travel
-
Full perimeter: rear work, awning strips, side floods, low-level rock lights
-
High-CRI repair light bar
-
2–4× headlamps, 2× lanterns, spare cells
-
Power: 100–200Ah LiFePO₄, DC-DC charger, 160–300W solar, labeled switch panel
Wiring a Simple Light Circuit: Step-by-Step
-
Plan the circuit: Decide the light(s), current draw, wire length, and switch location.
-
Choose wire & fuse: Use an online voltage-drop calculator or general charts. For many pairs of pods or a single flood, 14–12 AWG is common; fuse appropriately (e.g., 10–20A depending on load).
-
Mount the light: Securely attach to rack/bumper/awning. Aim it before tightening.
-
Route cable: Run along existing harness lines, inside split loom. Avoid sharp edges and heat sources.
-
Drill carefully (if needed): Deburr holes, use grommets and sealant.
-
Connect with relay (for higher loads): Battery (+) → fuse → relay → light (+). Light (–) to chassis ground. Switch controls relay coil via an ignition or constant feed (fused).
-
Test: Verify polarity, switch function, and dimming (if applicable). Check for interference with roof tents and lids.
-
Label & tidy: Label the switch, zip-tie slack, and keep a spare fuse taped near the fuse holder.
Energy Budget Example for One Night
-
String lights (5W) × 4 hours = 20Wh
-
Lantern at medium (4W) × 3 hours = 12Wh
-
Tripod flood (18W) × 2 hours = 36Wh
-
Headlamp (1W) × 2 hours = 2Wh
Total ≈ 70Wh.
With a 500Wh power station, that’s a small fraction of capacity. With a 12V 100Ah battery (~1,200Wh, but say 800Wh usable for AGM), you’re also well within limits.
Troubleshooting Common Lighting Issues
Flicker or dimming at high brightness: Voltage drop; increase wire gauge, shorten runs, or power from a closer distribution point.
Condensation inside lenses: Check seals, add desiccant packs, and ensure proper IP rating.
Interference on radios: Poorly shielded drivers; reroute wiring, add ferrite chokes, or choose RF-quiet lights.
Dead battery in the morning: Lights left on or parasitic draw. Add a master switch, use voltmeters, and consider a low-voltage disconnect for aux batteries.
Harsh/blinding glare: Lower mounting, more diffusion, warmer color temps, and dimming help. Aim carefully and use zone controls.
Final Thoughts
Great camp lighting is less about sheer lumens and more about thoughtful zones, diffusion, and efficient power management. Start with a simple trio—headlamp, lantern, and warm string lights—then grow into vehicle-mounted floods and a rear work light. As trips lengthen, add an auxiliary battery, DC-DC charging, and solar so your setup runs comfortably for days. Prioritize reliable fixtures with honest specs, proper IP ratings, and smart controls, and wire them safely with correct gauge, fusing, and weatherproofing. Do that, and your overlanding lighting options will keep your camp safe, functional, and genuinely pleasant long after the sun goes down.
Read More: Hygiene on the Road: Portable Showers for Overlanding