You’ve spent weeks planning the route, meticulously packing your recovery gear, and prepping your vehicle. But now, standing before your 4×4, you’re faced with the overlander’s eternal dilemma: a mountain of essential equipment and nowhere to put it. The cabin is for people, and the trunk is already full. This is where the journey truly begins—not on the trail, but in your driveway, solving the complex puzzle of overlanding storage.
A well-executed storage system is what separates a stressful, cluttered trip from a seamless adventure. It’s about more than just stuffing things onto your roof; it’s about integrating a secure, accessible, and efficient system that becomes a part of your vehicle. This definitive guide will walk you through every critical aspect of selecting and using roof racks and cargo management solutions, empowering you to conquer storage challenges and focus on the adventure ahead.
The Foundation: Understanding Your Roof Rack Options
Before you can strap down a single Pelican case, you need a robust foundation. Your roof rack system is the cornerstone of your external storage, and choosing the right type is the most important decision you’ll make.
Types of Roof Rack Systems
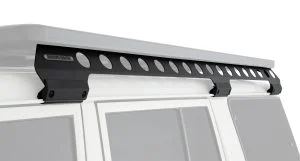
Factory/Integrated Rails: Many modern SUVs and trucks come with raised side rails running from the front to the back of the roof. It’s crucial to understand that these are rarely a complete rack system. They typically require aftermarket crossbars to be installed perpendicular to the rails. While convenient and aesthetically integrated, factory systems often have the lowest weight capacity. Always check your vehicle’s manual for the dynamic weight rating before loading them up.
Gutter-Mount Racks: A classic and incredibly robust solution, gutter-mount racks are the gold standard for many serious overlanders, especially those with vehicles featuring rain gutters (like older Toyota 4Runners, Land Cruisers, and Jeeps). These systems use strong metal feet that clamp directly onto the vehicle’s gutters, which are structurally integral to the roof. The primary advantage is exceptional strength and load-bearing capacity. They also typically stand taller off the roof, providing valuable clearance for mounting items underneath the rack itself.
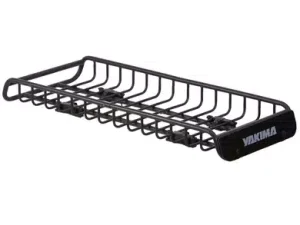
Basket Racks: Perhaps the most iconic overlanding accessory, basket racks are constructed from welded steel or aluminum tubing into a traditional “basket” shape. They offer unparalleled versatility. Their open-air design allows you to strap down items of virtually any shape and size—from jerry cans and shovels to large, irregularly shaped duffel bags. The sides of the basket provide excellent anchor points for straps. The downsides include increased wind noise and a slight negative impact on fuel economy due to their less aerodynamic design.
Platform Racks: Platform racks represent the modern evolution of the basket. Instead of a tubular basket, they feature a flat, solid surface made from expanded metal or sheet alloy. This design is incredibly versatile, acting as a blank canvas for your gear. It allows for easy mounting of specialized accessories like roof-top tents, awnings, shower systems, and lighting arrays. Gear can be strapped directly to the platform, and many models offer a modular design with adjustable crossbars and dedicated mounting points. They are often lighter than steel baskets but can be more expensive.

Crossbars Only: For the minimalist overlander or someone who only occasionally needs extra space, a simple set of crossbars might suffice. These are two bars that run across the width of your vehicle, connecting to the factory rails or directly to the roof. They are perfect for mounting specific items like a single roof box, a kayak, or a set of skis. However, they lack the versatility and real estate of a full basket or platform and are not suitable for carrying multiple loose items.

Key Factors When Choosing a Roof Rack
Weight Capacity: This is the non-negotiable spec. You must understand the difference between two key ratings:
-
Dynamic Load Rating: This is the maximum weight your rack can safely hold while the vehicle is in motion. This number is impacted by forces like wind, braking, and cornering. This is the most critical number to follow, and it is typically between 100-300 lbs for most systems. Never exceed it.
-
Static Load Rating: This is the maximum weight the rack can hold when the vehicle is parked. This is always a much higher number (often 600-800 lbs) as it doesn’t have to account for dynamic forces. This is relevant if you plan to walk on your roof or have a roof-top tent with people in it.
Material: Steel vs. Aluminum: The choice of material is a trade-off between strength, weight, and cost.
-
Steel: Offers superior strength and durability, often at a lower initial cost. It is the choice for those who need the absolute toughest platform and plan to carry very heavy, abrasive equipment. The significant downside is weight. A steel rack can add 100-150 lbs of weight to your vehicle before you even add gear, affecting fuel economy and your vehicle’s center of gravity.
-
Aluminum: The preferred choice for most modern overlanders. High-quality aluminum alloys are very strong but significantly lighter than steel, saving precious weight for your gear. Aluminum is also naturally corrosion-resistant, a major advantage when driving in salty or wet environments. The primary drawback is a higher upfront cost.
Vehicle Compatibility: A roof rack is not a one-size-fits-all product. It must be engineered specifically for your vehicle’s make, model, and year to ensure a secure fit that doesn’t damage the roof. Furthermore, you must consider clearance for features like a sunroof (ensuring it can still open) and antenna location.
Profile and Aerodynamics: The design of your rack directly impacts your driving experience. A low-profile, aerodynamic rack will generate less wind noise and have a smaller negative impact on fuel economy. Racks with a large front wind fairing are designed to mitigate this by directing airflow over the cargo. Open basket designs will naturally be louder and less efficient than a sleek platform or a roof box.
Top-Side Cargo Management: Containers and Carriers
With a solid rack chosen, the next step is deciding how to containerize and secure your gear. The right choice here protects your investment from the elements and theft.
Hard-Shell Roof Boxes
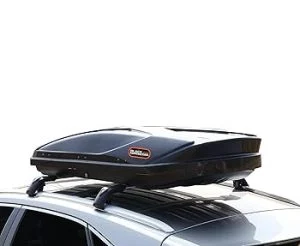
Hard-shell boxes, made from durable ABS plastic or composite materials, are like locking suitcases for your roof.
-
Pros: They are fully weatherproof and secure, protecting your gear from rain, dust, and prying eyes. Their aerodynamic shape minimizes wind noise and fuel economy penalties. They are also typically quick to install and remove.
-
Cons: Their fixed dimensions can be limiting for odd-shaped gear. Accessing something at the bottom requires unpacking half the box. They are also one of the more expensive options and must be stored somewhere when not in use.
-
Best For: Overlanders who prioritize protecting sensitive gear (e.g., camera equipment, sleeping bags, clothing) and who travel long distances on highways.
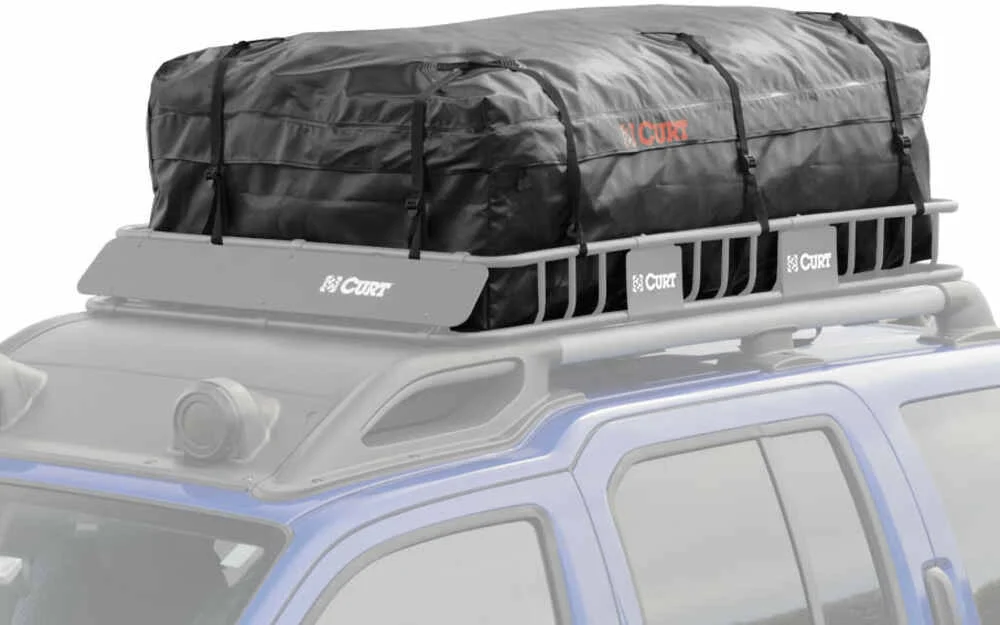
Roof Bags and Soft Racks
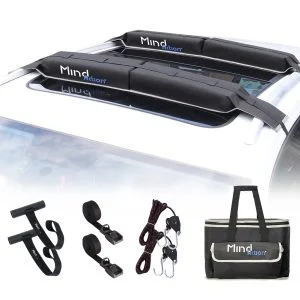
These are heavy-duty, waterproof bags made from materials like PVC or vinyl-coated polyester.
-
Pros: They are the most affordable and portable option. When empty, they can be rolled or folded into a small package for easy storage. They are also lightweight and can often be fitted to various roof rack sizes.
-
Cons: They offer zero security—a knife is all it takes to access your gear. While waterproof in theory, zippers and seams can potentially leak in a torrential downpour. They are also susceptible to UV degradation and abrasion over time.
-
Best For: Budget-conscious adventurers, those with occasional storage needs, or as a supplemental storage solution for bulky, lightweight items like sleeping pads or tents.
Straps, Nets, and Attachment Systems
Simply throwing items into a basket is a recipe for disaster. Proper securing is a skill.
-
Bungee Cords vs. Ratchet Straps: Avoid using bungee cords for anything critical. They stretch, lose tension with temperature changes, and can snap or come unhooked without warning. For securing any valuable or heavy gear, you must use high-quality ratchet straps or cam straps. Ratchet straps provide immense tension for very heavy loads, while cam straps are faster to use and are perfect for most medium-duty applications. Always use straps with flat hooks or loop ends to prevent damage to your rack’s powder coating.
-
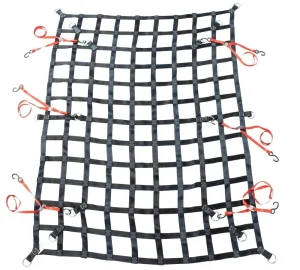
Cargo Nets: Elasticated cargo nets are incredibly useful for securing a layer of lighter, bulkier items like firewood, recovery boards (Maxtrax), or rolled-up tarps. They keep things from shifting while remaining easy to access.
-
Best Practices: Always cross your straps in an “X” pattern over your cargo to prevent forward/backward and side-to-side movement. Protect any sharp corners on your gear with a piece of carpet or foam to prevent them from cutting through the strap or wearing it down. Before you drive, give everything a firm shake to ensure it’s secure.
Integration and Accessories: Building a Complete System
A true overlanding storage system is more than a rack and a box; it’s an integrated ecosystem that keeps your gear organized and accessible.
Mounting Accessories to Your Rack
Modern racks are designed with modularity in mind.
-
Shovel & Axe Mounts: These are specialized, quick-release clamps that hold your tools tightly to the side of your rack, making them instantly accessible for trail clearing or camp chores.
-
Hi-Lift Jack Mounts: A 60-pound jack bouncing around inside your vehicle is dangerous. Dedicated mounts secure this essential recovery tool to the outside of your rack, saving interior space and keeping it within reach.
-
Rotopax / Jerry Can Holders: Transporting extra fuel and water is a core tenet of overlanding. These secure holders are designed to safely carry liquid containers, preventing them from tipping, leaking, or becoming projectiles.
-
Awnings & Light Bars: Your roof rack provides the perfect foundation for mounting a 270-degree awning for instant shade or a row of LED lights for illuminating camp or dark trails.
-
Importance of Anti-Theft: When your entire kit is on display, security matters. Use locking lugs for your rack feet, locking straps for your boxes and fuel cans, and consider security bolts for high-value accessories.
The Overlanding Storage Hierarchy: Where to Put What
Strategic packing is as important as the gear itself.
-
Guidelines for Weight Distribution: The golden rule is to keep weight low, centered, and forward. The heaviest items should be stored inside the vehicle, as low as possible. If they must go on the roof, place them as far forward as possible (directly over the front axle) and as low in the basket or box as you can. This minimizes the negative impact on your vehicle’s center of gravity and handling.
-
Accessibility: Think about what you need and when. Your recovery gear (shackles, soft shackles, tree saver) should be the most accessible. Items you need only at camp (chairs, table, grill) can be buried deeper. Frequently used items like recovery boards should be strapped to the outside of the rack for quick access.
-
Weather Sensitivity: Pack according to the elements. Items that must stay absolutely dry—sleeping bags, clothes, electronics—belong in waterproof hard boxes or high-quality dry bags inside a soft roof bag. Items that are weather-resistant, like firewood or Maxtrax, can be strapped down openly.
Installation and Safety Considerations
A poorly installed rack is a hazard. Taking the time to do it right is paramount for your safety and the safety of others on the road.
Proper Installation is Critical
Do not rush this process.
-
Follow the Manual: Every reputable rack system comes with detailed, model-specific instructions. Follow them to the letter.
-
Use a Torque Wrench: This is not a place for “gutentight.” Over-tightening can strip threads or crack mounting points, while under-tightening can lead to catastrophic failure. Use a torque wrench to achieve the manufacturer’s specified bolt tightness.
-
Periodic Checks: After the first 50-100 miles of driving, re-check the tightness of all bolts and fittings. The vibrations of driving will inevitably settle the rack. Make it a habit to visually inspect your rack and strap tightness at every fuel stop or camp setup.
The Impact on Your Vehicle
Adding a rack and hundreds of pounds of gear changes your vehicle’s dynamics.
-
Center of Gravity: Raising weight makes your vehicle more top-heavy. You will notice increased body roll during cornering. You must adjust your driving style accordingly: take corners slower and be acutely aware of off-camber trails that could increase the risk of a rollover.
-
Fuel Economy: Accept that your fuel economy will decrease. The combined weight and wind resistance of a loaded rack can easily reduce highway MPG by 10-20%. Factor this into your fuel planning, especially for remote trips where gas stations are scarce.
-
Garage and Obstacle Clearance: This is the simplest yet most often forgotten point. Measure your new total vehicle height and write it down on a piece of tape on your dashboard. Be hyper-aware of low-hanging branches on tight trails, and avoid parking garages altogether unless you are certain of clearance.
Conclusion
Building the perfect overlanding storage system is a rewarding process that directly enhances your comfort, capability, and safety on the trail. It begins with an honest assessment of your gear and vehicle, leading to the choice of a foundational roof rack that matches your ambition. From there, it’s about layering on the right containers, securing them with confidence, and integrating accessories that make your life easier.
Remember, the goal is not just to carry more stuff; it’s to carry it smarter. A well-organized vehicle is a joy to travel and live out of, turning a packed rig from a source of stress into a symbol of readiness for any adventure. Start with a quality rack, invest in reliable straps and containers, and always prioritize safe loading practices. Now, get out there and explore, secure in the knowledge that your gear is packed for the journey.
What’s the biggest challenge you’ve faced with your overlanding storage setup? Share your hard-earned tips or questions in the comments below!
Read More: Water Purification: Ensuring Safe Drinking Water While Overlanding