Cooking on the road isn’t just about staying fed—it’s about creating comfort, sharing experiences, and fueling adventure. An effective Overlanding Kitchen Setup can transform your vehicle into a mobile basecamp, whether you’re trekking deep into remote wilderness or navigating well-trodden trails. From minimalist setups to full-featured galleys, your kitchen should reflect how and where you travel, ensuring you’re ready for everything from morning coffee at sunrise to hearty meals under the stars.
From minimalist setups to full-featured galleys, your kitchen should reflect how and where you travel. The right gear ensures you’re ready for morning coffee at sunrise, hearty meals under the stars, and everything in between.
Overlander or Weekend Adventurer?
Before building your kitchen setup, consider what kind of traveler you are. A full-time overlander spending weeks off-grid will have very different needs than a weekend warrior hitting the trails once or twice a month.
If you’re an overlander, durability, efficiency, and long-term food storage are key. You’ll need a reliable water system, a capable fridge or cooler, and a stove that can handle daily use. Space-saving cookware and multi-functional tools become essential.
If you’re a weekend adventurer, your priorities may lean toward ease of setup and packability. A cooler and portable stove may be all you need, with simple storage solutions for dry goods. Your kitchen can be lightweight and compact without sacrificing the joy of a good meal at camp.
Understanding your travel style helps you choose the right components for your kitchen, so you’re always ready to cook, no matter how far you roam.
Water Systems for Overland Cooking
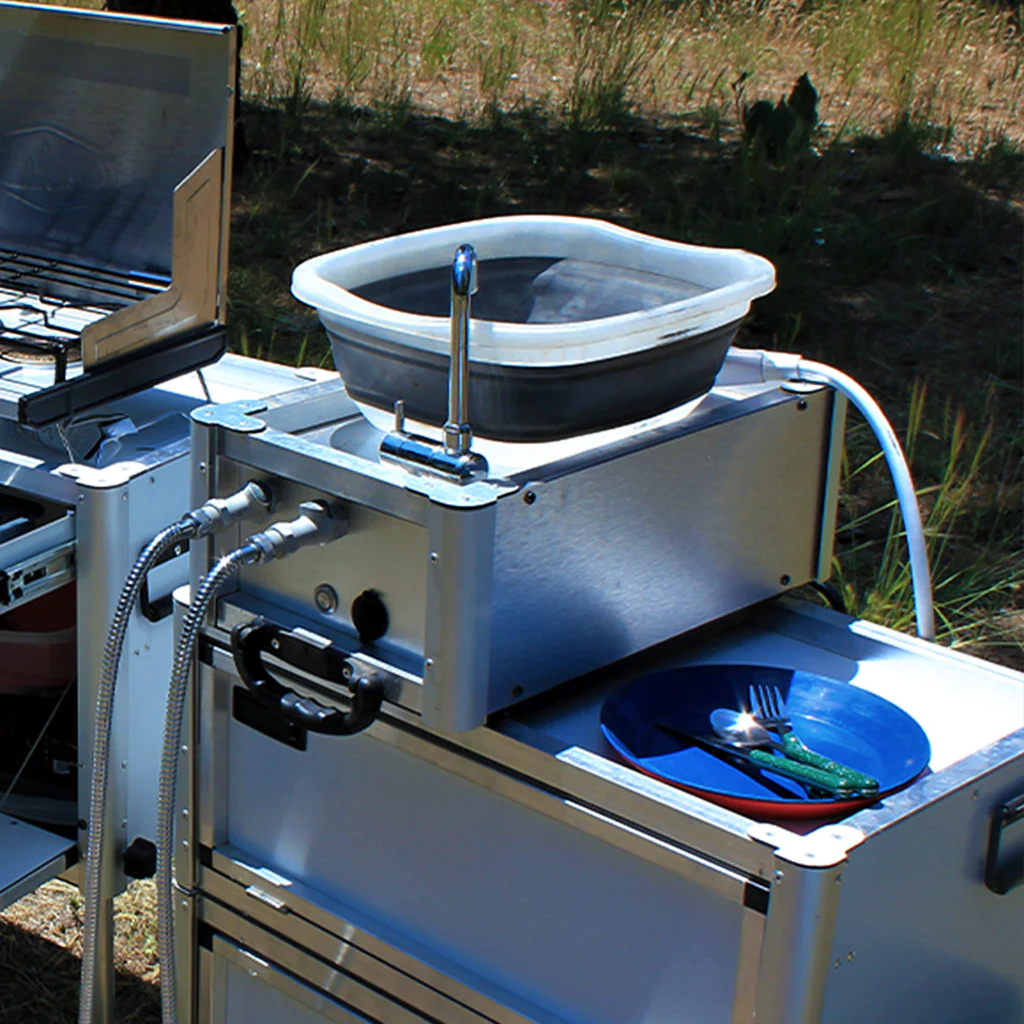
Water is the cornerstone of any overlanding kitchen. It’s essential not just for drinking, but also for cooking, cleaning, and sanitation. A dependable water system ensures you’re self-sufficient, whether you’re out for a weekend or on an extended expedition.
Portable Water Containers:
At the most basic level, Jerry cans or BPA-free plastic containers can suffice for short trips. They’re easy to store and refill, making them a favorite among weekend travelers. Look for options with integrated spigots for easier pouring and minimal spillage.
Built-In Water Tanks:
For more committed overlanders, onboard water tanks—often mounted under or inside the vehicle—offer higher capacity and convenience. These systems typically include a 12V pump, faucet, and sometimes even a filtration system. Some setups can be plumbed to your galley sink for a home-like kitchen experience.
Water Filtration:
Regardless of your water source, having a reliable filter or purification system is a must. Portable options like gravity filters, UV purifiers, or inline filters connected to your water line can help you safely source water from streams, rivers, or local taps.
Hot Water Access:
If your overlanding includes extended trips or cold weather environments, consider a water heater or solar shower setup. While not essential, having warm water for washing up or prepping dehydrated meals adds a layer of comfort on the trail.
Plan on carrying at least 1.5–2 gallons of water per person per day for cooking, drinking, and cleaning. Always overestimate—having extra’s better than running short in remote areas.
Food Storage for Your Overland Galley
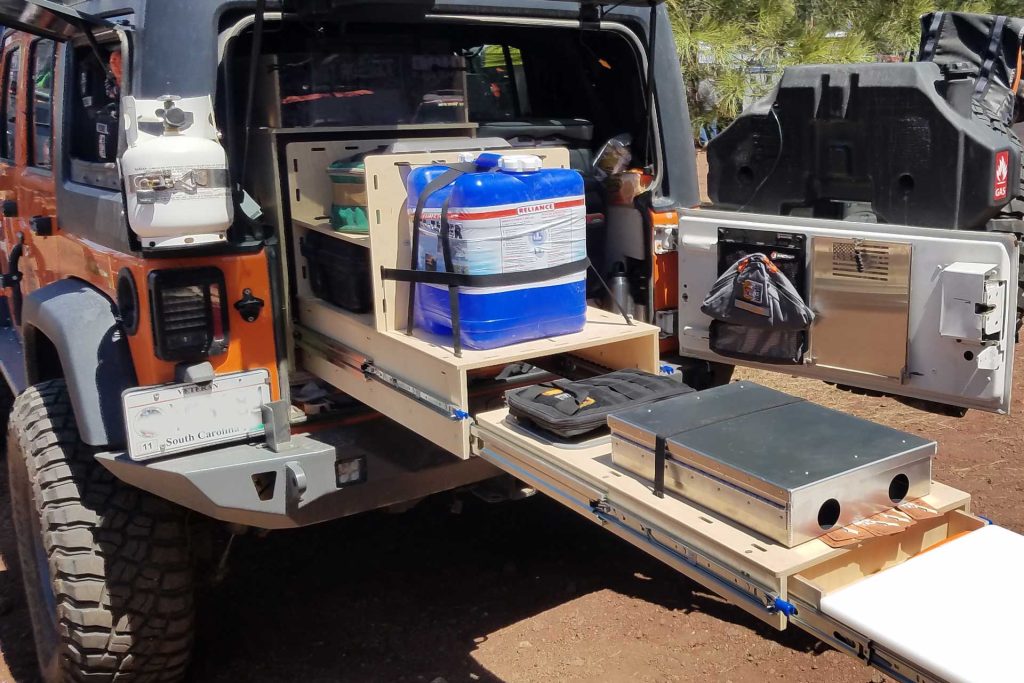
Keeping your food fresh, safe, and well-organized is just as important as how you cook it. A solid food storage strategy ensures you don’t waste time searching for ingredients or worrying about spoilage, especially when you’re far from the nearest grocery store.
Dry Storage: Where Do I Store My Food?
Dry goods like rice, pasta, oats, canned items, spices, and snacks can be stored in weatherproof bins, ammo cans, or drawer systems. These storage containers should be:
-
Dustproof and waterproof
-
Rodent-resistant
-
Easy to label and access
Stackable plastic bins or modular drawer systems (like those from Decked or Front Runner) are popular choices for organized galleys. Don’t forget to use airtight containers or vacuum-sealed bags for bulk items like flour or grains to prevent pests and spoilage.
Keep in mind the temperature swings—store dry goods in cool, shaded spots inside the vehicle or in insulated drawers to prevent degradation, especially on long trips.
Cold Storage for Overlanding
Perishables like meats, dairy, fresh vegetables, and leftovers need proper cooling to stay safe. There are two main categories of cold storage: coolers and refrigerators, each with its own pros and cons (covered in the next section).
For now, remember:
-
Organize by meal or day to reduce the number of times you open the unit.
-
Use food-grade containers to avoid leaks and odors.
-
Freeze water bottles to double as cold packs and drinking water.
Keeping your cold and dry items separated helps preserve energy and ensures better food management during your trip.
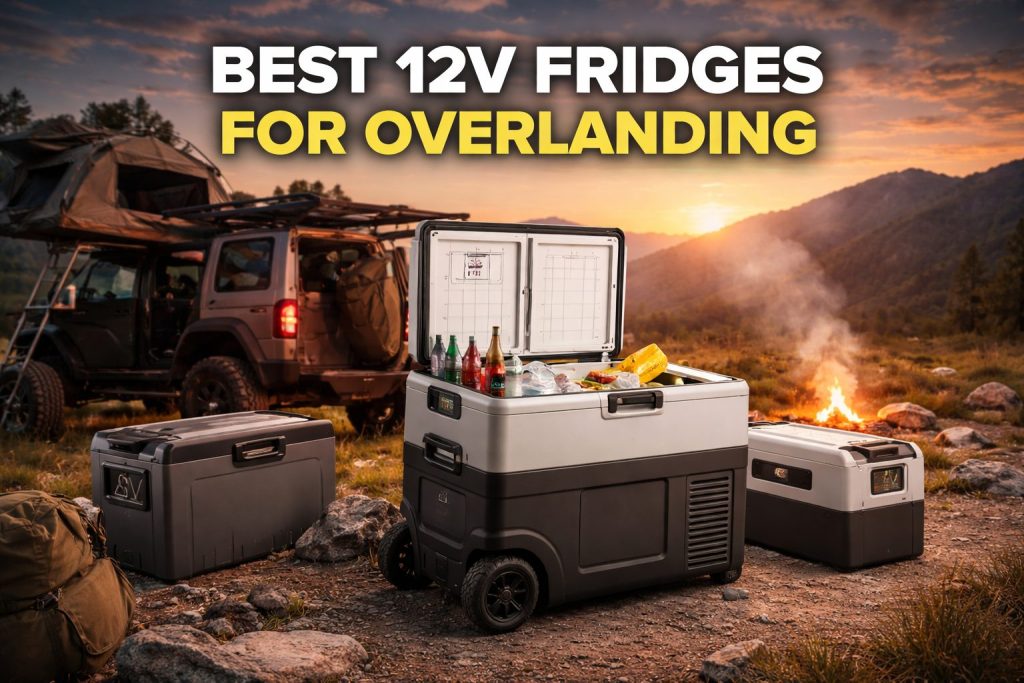
Refrigerators and Coolers–Pros and Cons
Choosing between a cooler and a refrigerator is one of the most important decisions for your overlanding kitchen. Your choice will depend on trip length, budget, available power, and how much food you plan to carry. Let’s break down the pros and cons of each option to help you decide what best fits your setup.
Cooler
A tried-and-true option, coolers are popular for their simplicity, durability, and lack of power requirements.
Pros:
-
No power needed: Great for minimalist builds or vehicles without electrical setups.
-
Lightweight and portable: Easy to move in and out of your rig.
-
Budget-friendly: Significantly more affordable than 12V refrigerators.
-
Rugged options available: Brands like YETI, RTIC, and Pelican make highly durable, well-insulated coolers that hold ice for days.
Cons:
-
Limited cold retention: Even high-end coolers only keep ice for 5–10 days, depending on conditions.
-
Ice management required: You’ll need to buy and replenish ice regularly or use frozen blocks.
-
Water buildup: Melted ice creates standing water unless you use a dry basket system.
-
Reduced usable space: Ice takes up room that could be used for food.
Coolers are ideal for short trips or weekend excursions where power is limited and convenience outweighs precision temperature control.
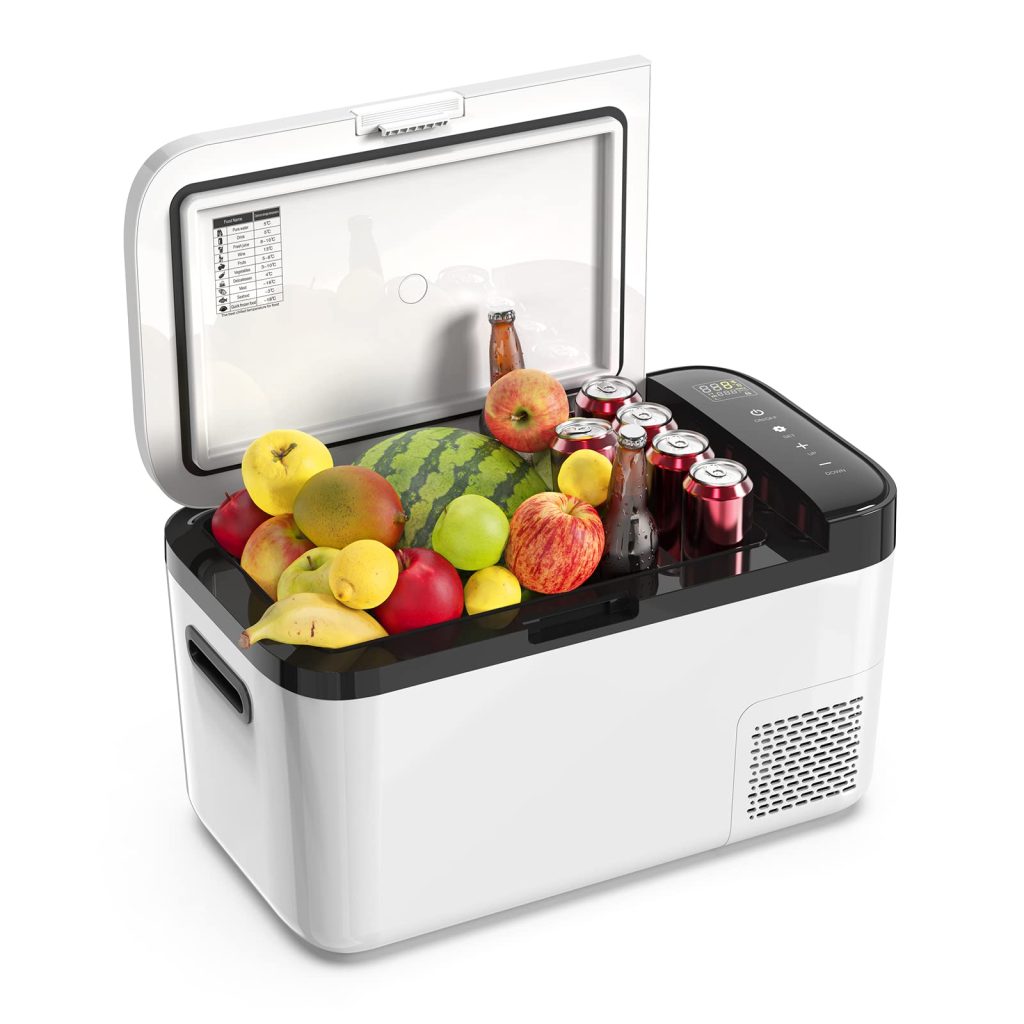
Refrigerator
12V refrigerators offer precise temperature regulation and longer-term food preservation, making them a top choice for serious overlanders.
Pros:
-
Consistent cooling or freezing: Set the temperature exactly, often down to freezing or below.
-
No need for ice: All available space can be used for food and drinks.
-
Long-term storage: Perfect for extended trips or full-time vehicle living.
-
Low power draw: Efficient models from brands like Dometic, ARB, and ICECO can run for days off a solar-charged battery.
Cons:
-
More expensive: Initial cost is significantly higher than a cooler.
-
Power dependent: Requires a reliable 12V system and ideally solar charging for extended off-grid use.
-
Heavier and bulkier: Harder to move around, especially when fully loaded.
-
Installation and wiring: Some models may need permanent mounting or custom power solutions.
Refrigerators are a game-changer if you’re building a full-time or long-haul overlanding rig, providing peace of mind and meal versatility no matter where you travel.
Camp Stoves for Overland Builds
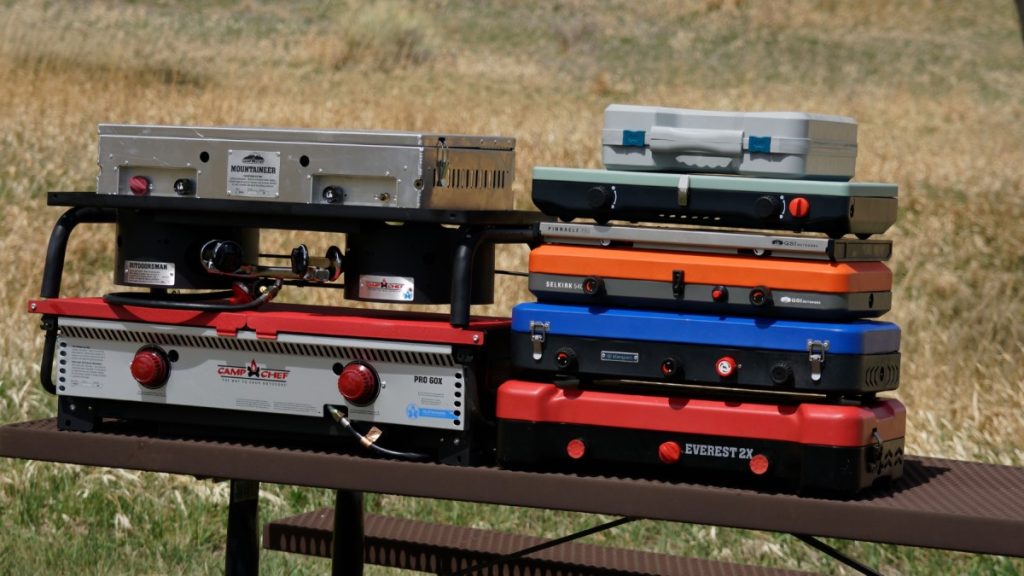
The heart of any overlanding kitchen is a reliable stove. Whether you’re boiling water for morning coffee or cooking a full dinner under the stars, your stove choice will impact both the performance and enjoyment of your meals on the trail.
Types of Overland Stoves:
-
Two-Burner Propane Stoves:
These classic camp stoves, such as those from Camp Chef or Coleman, are dependable, affordable, and easy to use. They provide enough power and space to cook multiple dishes simultaneously. They’re perfect for larger groups or those who enjoy more elaborate camp meals. -
Single-Burner Butane or Isobutane Stoves:
Compact and ultralight, these stoves are best for solo travelers or minimalist setups. While they’re less powerful, they’re great for quick tasks like heating soup or coffee. -
Integrated Stove Systems (Jetboil, MSR WindBurner):
These are ideal for boiling water fast and are widely used by backpackers and overlanders with limited kitchen space. They aren’t suited for frying or simmering, but are excellent for dehydrated meals. -
Skottle and Griddles:
A Skottle (a disc-like cooking surface powered by propane) is popular in the overlanding community for its versatility. It allows you to fry, stir-fry, or grill in an open-air setup—great for group meals and varied dishes.
What to Consider When Choosing a Stove:
-
Fuel type and availability (propane is the most common)
-
Number of burners
-
Wind protection
-
Portability and storage space
-
Ease of cleaning
A good stove balances power, fuel efficiency, and size, making it a reliable companion no matter where your overland journey takes you.
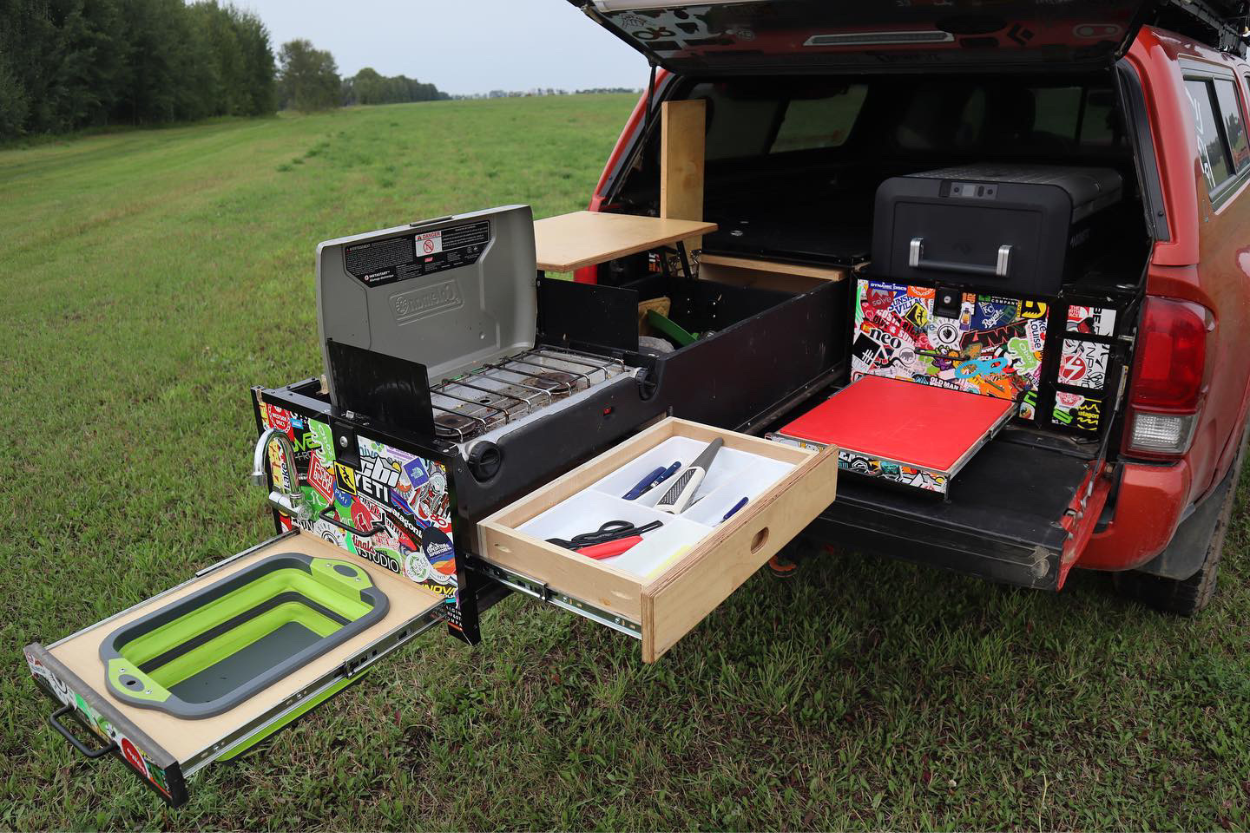
Pots, Pans, Utensils, and Such
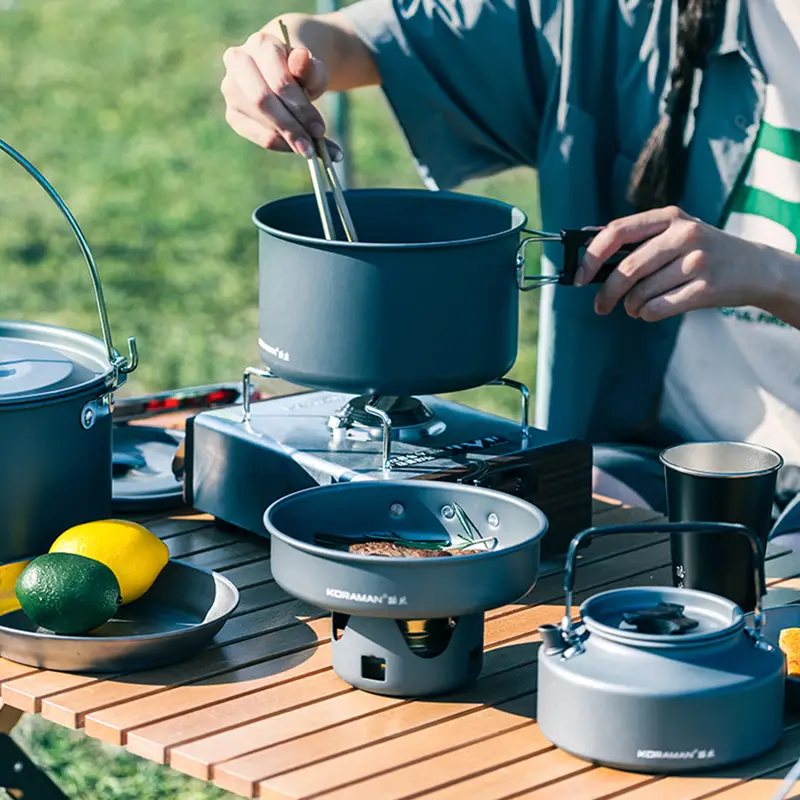
Having the right cooking tools makes all the difference between a frustrating meal and a seamless outdoor cooking experience. Your overland kitchen should be equipped with durable, space-efficient gear designed for rugged use.
Essential Cookware:
-
One or Two Versatile Pots:
A medium-sized pot (2-3 quarts) covers most of your boiling and simmering needs. Choose hard-anodized aluminum or stainless steel for durability. -
Frying Pan or Skillet:
A nonstick or cast-iron skillet is ideal for frying eggs, sautéing veggies, or cooking meat. Cast iron retains heat well but is heavier and requires maintenance. -
Collapsible or Nesting Sets:
Space-saving cookware that nests together is perfect for small storage areas and overland drawers.
Key Utensils to Pack:
-
Spatula and tongs
-
Long-handled spoon (wooden or silicone)
-
Can opener
-
Cutting board (preferably a thin, flexible one)
-
Sharp chef’s knife with a protective sheath
-
Bottle opener and corkscrew (for the finer moments)
Extras That Improve Efficiency:
-
Measuring cups/spoons (collapsible sets work well)
-
Mixing bowl (collapsible silicone options are available)
-
Grater or peeler, depending on your meal plans
Storage Tip:
Use roll-up utensil organizers or tool bags to keep everything in one place and reduce clutter. Magnetic strips or drawer dividers also help maintain order inside drawers or bins.
The Galley Table
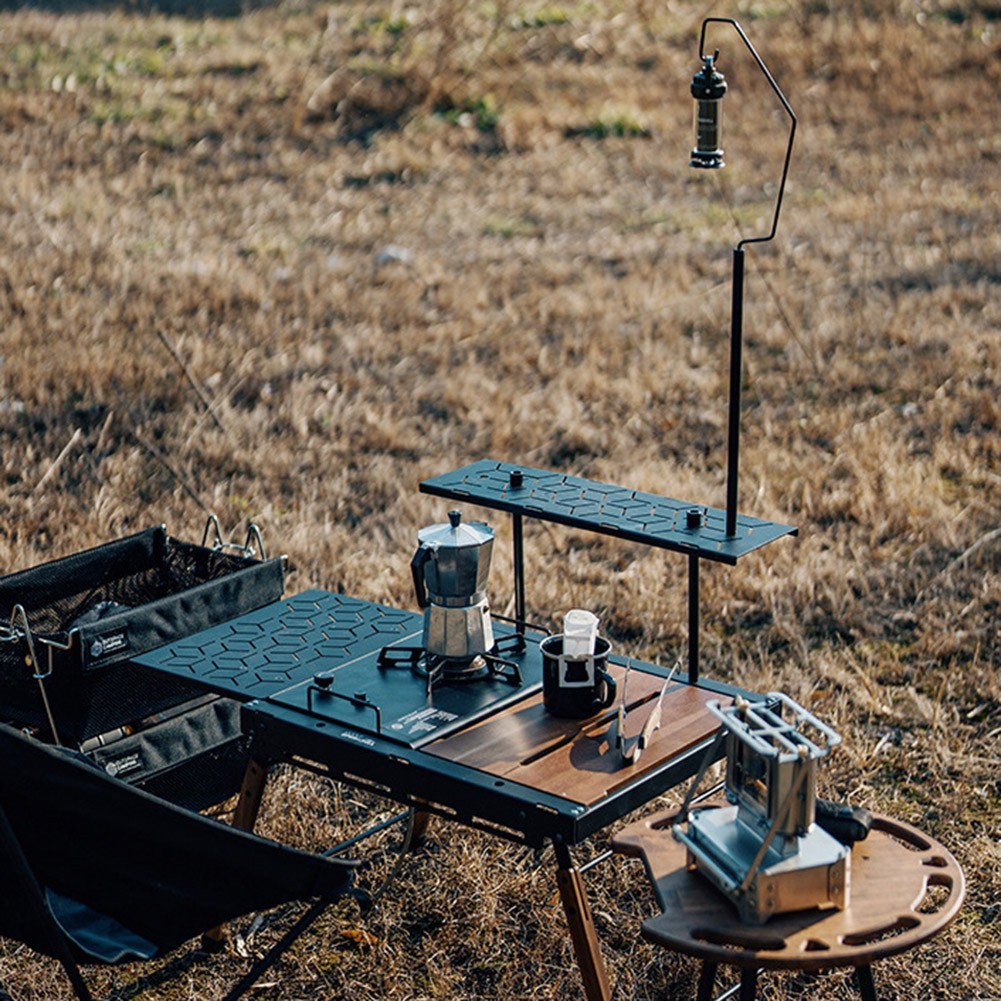
A galley table serves as the central workspace of your overland kitchen. It’s where you chop vegetables, prep meals, assemble sandwiches, and sometimes even eat. Having a sturdy, flat surface that sets up quickly can dramatically improve the efficiency and comfort of your cooking setup.
Types of Galley Tables:
-
Folding Camp Tables:
Lightweight and collapsible, these tables pack down small and are easy to stow. Many models are height-adjustable and come with built-in storage or shelves. -
Slide-Out Drawer Tables:
Integrated into drawer systems or vehicle builds, these slide-out tables save space and provide quick access. Often built from aluminum or stainless steel, they’re incredibly sturdy. -
Rear Bumper or Tailgate Tables:
Mounted directly to the tailgate or rear door, these fold-down surfaces are perfect for quick stops or minimalist builds. Brands like Goose Gear and Front Runner offer rugged options that mount securely and fold flat.
Things to Consider:
-
Weight capacity: Ensure your table can support your cooking gear and food.
-
Surface area: Enough space to prep meals without crowding.
-
Ease of cleaning: Smooth, non-porous surfaces like aluminum or stainless steel are best.
-
Stability: Adjustable legs and locking mechanisms help prevent wobbling on uneven ground.
A reliable galley table turns any clearing, campsite, or roadside stop into a fully functional kitchen. It’s a small addition that adds major functionality to your cooking system.
The Awning
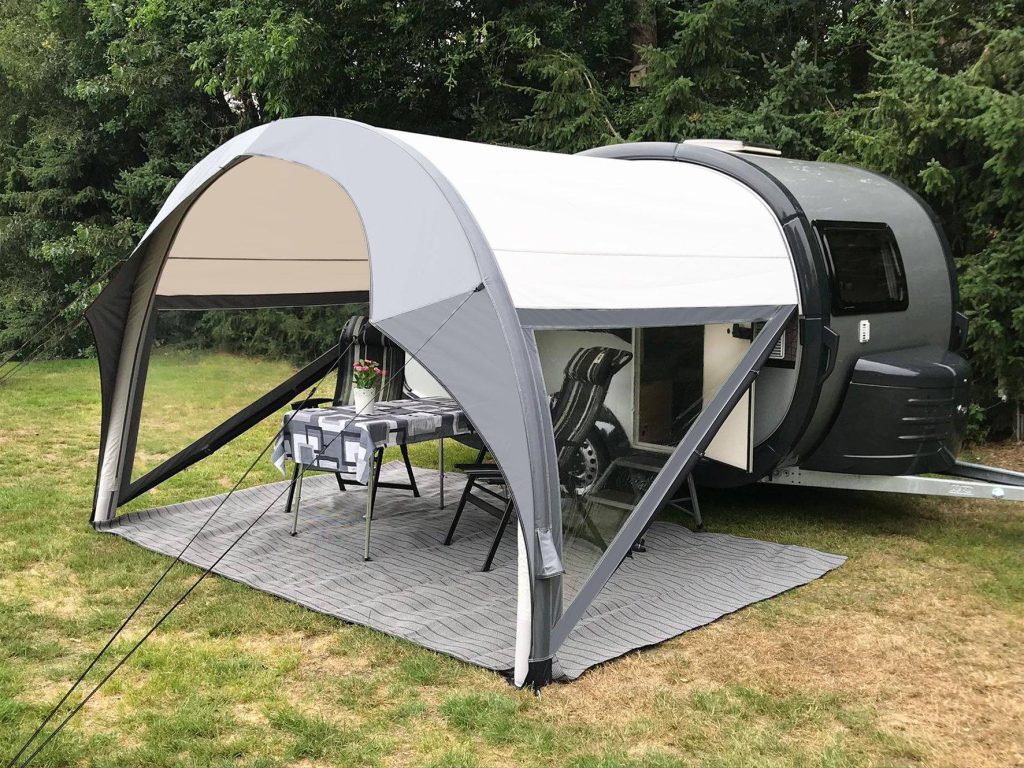
Cooking outdoors is liberating—but it also exposes you to the elements. That’s where an awning becomes a game-changer. Whether it’s scorching sun, light rain, or even snow, an awning provides essential shelter over your kitchen area, making outdoor cooking more practical and comfortable.
Types of Awnings for Overlanding:
-
Straight Pull-Out Awnings:
The most common type, these roll out from the side of your vehicle and offer quick shade. They’re simple, compact, and can be deployed in under a minute. -
270-Degree Awnings:
These wrap around the side and rear of your vehicle, providing extensive coverage—ideal for protecting both your kitchen and gear area. Popular among serious overlanders, they often include optional walls or extensions for full enclosure. -
Awning Tents or Rooms:
Some awnings come with detachable walls that convert the shaded area into a full enclosure, perfect for bug protection or privacy during foul weather.
Key Features to Look For:
-
Durable, UV-resistant fabric
-
Sturdy aluminum or steel poles
-
Quick deployment and packing
-
Compatibility with your vehicle’s roof rack
Awnings create a reliable workspace, protect your cooking gear, and offer a place to relax in the shade. They’re especially valuable on longer trips or in areas where the weather is unpredictable.
Food Waste and Trash
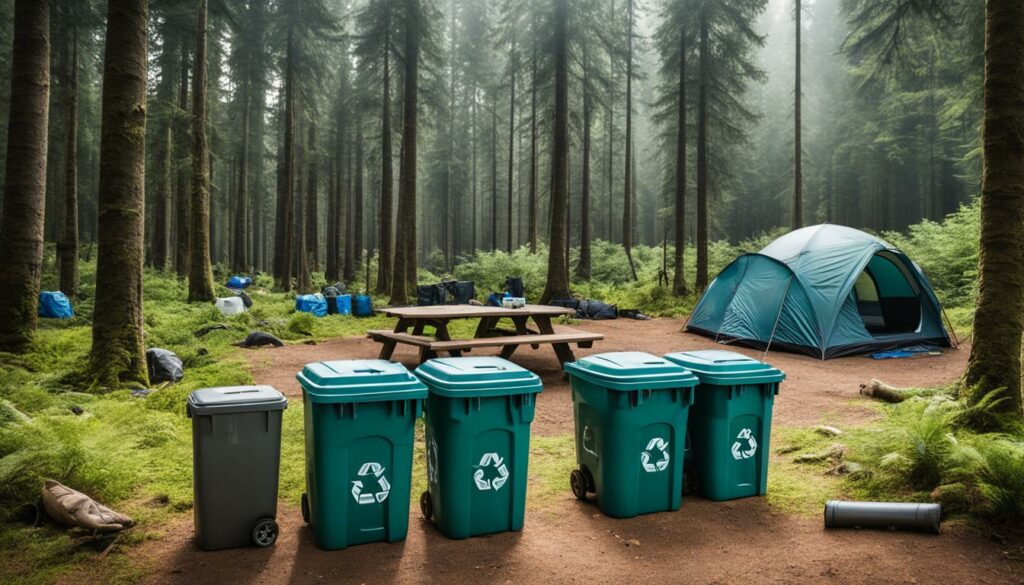
Managing food waste and trash is an essential—but often overlooked—part of overland cooking. A clean and responsible camp kitchen not only protects the environment but also helps keep animals away, reduces odor, and makes packing out much easier.
Separate Your Waste:
-
Food scraps: Keep a sealed container or compostable bag specifically for food waste. Avoid tossing scraps into the fire, especially in sensitive wilderness areas.
-
Recyclables: Bring a separate bag or bin for cans, bottles, and plastics. Collapsible recycling bins are great space-savers.
-
Trash: Use heavy-duty garbage bags and store them in a lidded container or odor-resistant bag like the Trasharoo (which mounts on your spare tire).
Smart Practices:
-
Minimize waste at the source. Pre-portion meals, prep ingredients at home, and repackage items to reduce the amount of packaging you bring.
-
Use reusable containers and utensils. This limits single-use plastics and cuts down on bulk waste.
-
Clean as you go. Wash dishes promptly and pack out all waste. Don’t bury or burn trash unless local regulations explicitly allow it.
Animal Safety Tip: In bear country or areas with wildlife, always store food waste in sealed containers away from your sleeping area, and never leave trash unattended overnight.
Final Pro-Tips for Your Camp Kitchen
After dialing in your setup, these practical tips can help you cook smarter, cleaner, and with less hassle in the backcountry.
1. Keep a Camp Kitchen Checklist:
From utensils to spices to spare propane canisters, having a checklist helps ensure you never forget the essentials.
2. Pack a Compact Spice Kit:
A small container with your favorite seasonings elevates even the simplest camp meals. Consider using pill organizers or small jars to save space.
3. Use a Dishwashing System:
Set up a two-bin system: one with soapy water and another with clean rinse water. A mesh drying rack or towel line helps everything dry fast.
4. Bring a Headlamp or Lantern:
Lighting is key for nighttime cooking and cleanup. Hands-free options make food prep safer and easier after sunset.
5. Always Have a Backup Cooking Method:
Weather, equipment failure, or fuel issues can happen. Carry a compact backup like a small alcohol stove, or even a fire-safe grill grate.
6. Organize with Storage Tubs or Drawers:
Label containers and create zones for dry goods, cookware, and cleaning supplies. An organized kitchen reduces setup time and stress.
7. Don’t Skimp on Cleanup Gear:
Bring biodegradable soap, scrubbers, microfiber towels, and a dedicated drying cloth. A clean kitchen is a safer and more enjoyable one.
8. Practice Before You Go:
Test your setup at home or on a short overnight trip before heading deep into the backcountry. This helps you identify what works and what needs adjustment.
With the right mindset and gear, your overland kitchen can become one of the most rewarding parts of your journey, where meals are as memorable as the miles.
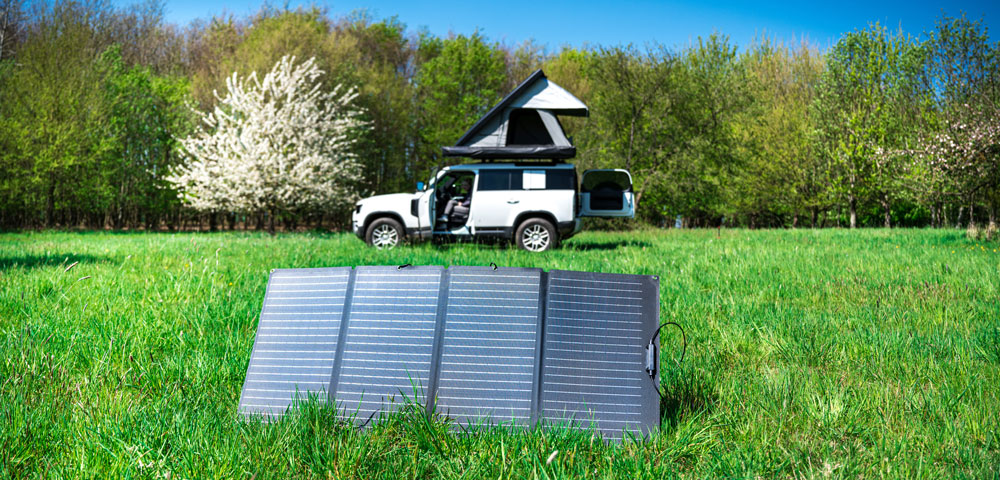
Read More: Portable Power Solutions for Off-Grid Overlanding